- Published on
Toubkal (4,167m) - Route Guide & GPX | Climbing Morocco's Highest Peak in Winter
- Author
-
-
- Name
- Posts
- Posts
-
Last updated: July 2026
The Atlas Mountains stretch across North Africa, forming a natural barrier between the Sahara Desert and the Mediterranean. The range tops out in the High Atlas at Mount Toubkal (4,167m), the highest peak in Morocco and North Africa. Characterised by an arid landscape, the Atlas Mountains stand in stark contrast to their European counterpart, the Alps. In summer, the peaks are dry and scree-clad, while winter brings snow and ice that transform the mountains. Yes, it does snow in Africa.
Climbing Toubkal is one of the most accessible ways to reach 4,000m, and its popularity has grown in recent years, helped by relatively low guide fees and social media coverage. The trek starts from Imlil, at the base of the Toubkal National Park, which is home to the majority of Morocco’s 4,000m peaks. Despite being one of the main tourist hubs in the Atlas Mountains, Imlil is a far cry from Alpine resort towns - there are no cable cars or luxury hotels, just a handful of food shops and some outdoor stores renting out battered mountaineering kit. This rural setting is part of the appeal; you climb the whole mountain with minimal creature comforts.
The snow-covered Atlas Mountains on the ascent to the refuge.
For us, climbing Toubkal would be our first 4,000m mountain without mechanical assistance, having previously climbed Allalinhorn last summer. A winter ascent of Mount Toubkal would also provide an entirely new challenge, turning the usual hiking route into a winter mountaineering challenge. Although the route is non-technical, it is mandatory to hire a guide to climb Mount Toubkal, even in summer, so we signed up for a group expedition with "Get Your Guide". The climb promised to be testing but incredibly rewarding.
Mount Toubkal Route Guide - At a Glance
Morocco’s Mount Toubkal, or Jebel Toubkal (4,167m), is the highest mountain in North Africa, the Atlas Mountains, and the Arab world. The route to its summit is generally considered straightforward in summer, though it remains a serious high-altitude ascent. In winter, November – March, snow and ice necessitate the use of crampons and an ice axe, significantly increasing the difficulty.
Overall rating: ★★★★☆- Type 2 fun for sure.
Difficulty: ★★★★☆- Physically demanding, especially on day two. Winter ascent (graded F) requires crampons and a single ice axe; no ropes or technical climbing. Easier in the summer.
Start point: Imlil
Distance: 35km round trip
Elevation gain: 2,500m
Time: 2 days minimum. Some complete it in a single day, but I wouldn't recommend it - certainly not in winter.
- Day 1 - 13 km - Gradual ascent to refuge ~1,500m elevation gain
- Day 2 - 22km - Pre-dawn summit push ~1,000m ascent followed by a long 2,500m descent
Gear needed:
- Winter - Ice axe and crampons
- Summer - Standard hiking gear
Need to know: Although not technically difficult, a licensed guide is required by law to climb Toubkal. There is a police checkpoint en route where you must present your passport and be accompanied by your guide.
The Ascent
Day 0 - Getting to Imlil
We landed in Marrakech first thing on Saturday morning and stepped off the plane into the sweltering sun. After negotiating the busy arrivals hall and confusing passport control with our different accommodations, we jumped in a taxi and made the 1.5-hour journey to Imlil (1,800m).
The scenery was far lusher than expected, with yellow wildflowers bordering the road for much of the journey to the mountains. Many of the locals we spoke to explained that the weather had been unusually wet the past few weeks, which everyone seemed pleased about. The past years have been very dry, with little water in the mountain villages, and areas around Marrakech being practically turned into a desert. That rain in Marrakech would have fallen as snow on the High Atlas Mountains, adding an extra challenge to our trek over the next couple of days.
We crossed a bridge, which the driver explained marked the start of the mountains, and the road began to wind its way skywards, the air turning noticeably cooler as the snowy peaks began to show themselves. Before long, we reached Imlil, where there was a river cascading across the road. The taxi stopped before tackling the gravelly crossing, and our host led us up a steep dirt path to a lovely lodge where we were welcomed with a tea ceremony and snacks with a view over to Toubkal.
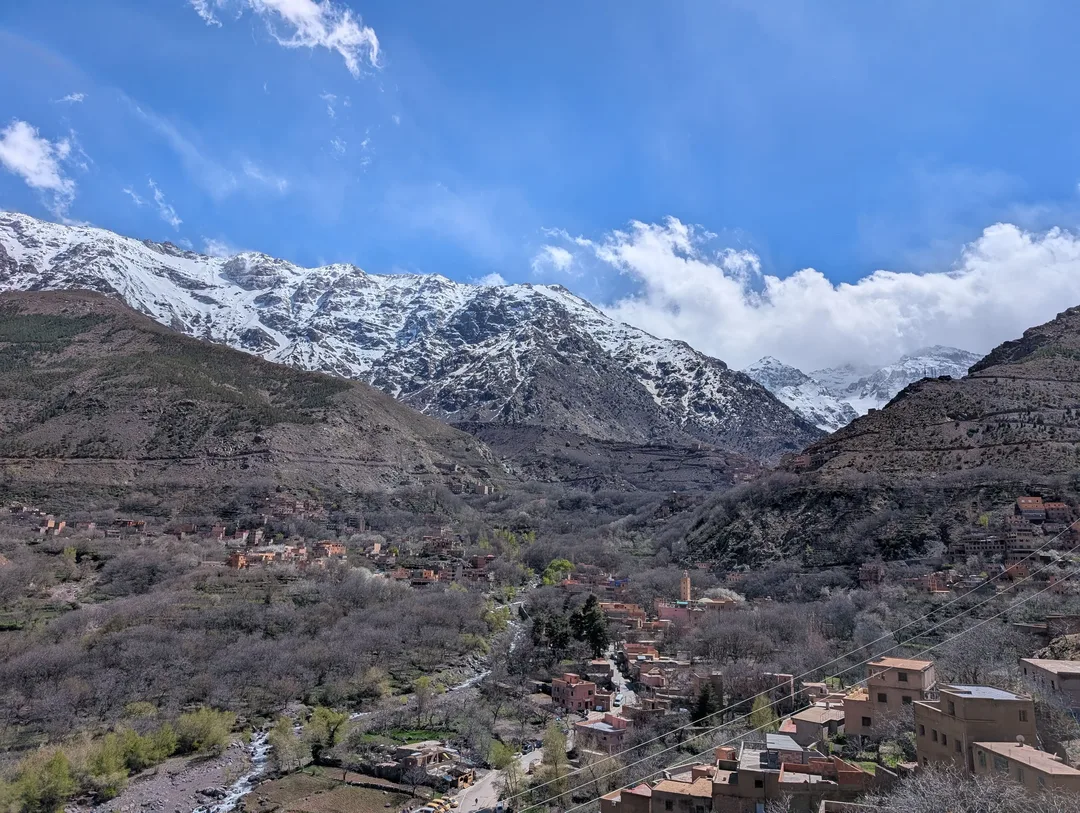
VIew over Imili with the snow-covered peaks hiding in the cloud.
We spent the first day getting to know Imlil, eating copious amounts of tagine and checking our bags, ready for the two full-on days to come.
When planning our trip, we were initially going to do a 3-day climb to help with acclimatisation; however, the thought of two sleepless nights in a mountain refuge didn’t fill us with joy. We decided to compromise and spend a night in Imlil to at least help a little with acclimatisation.
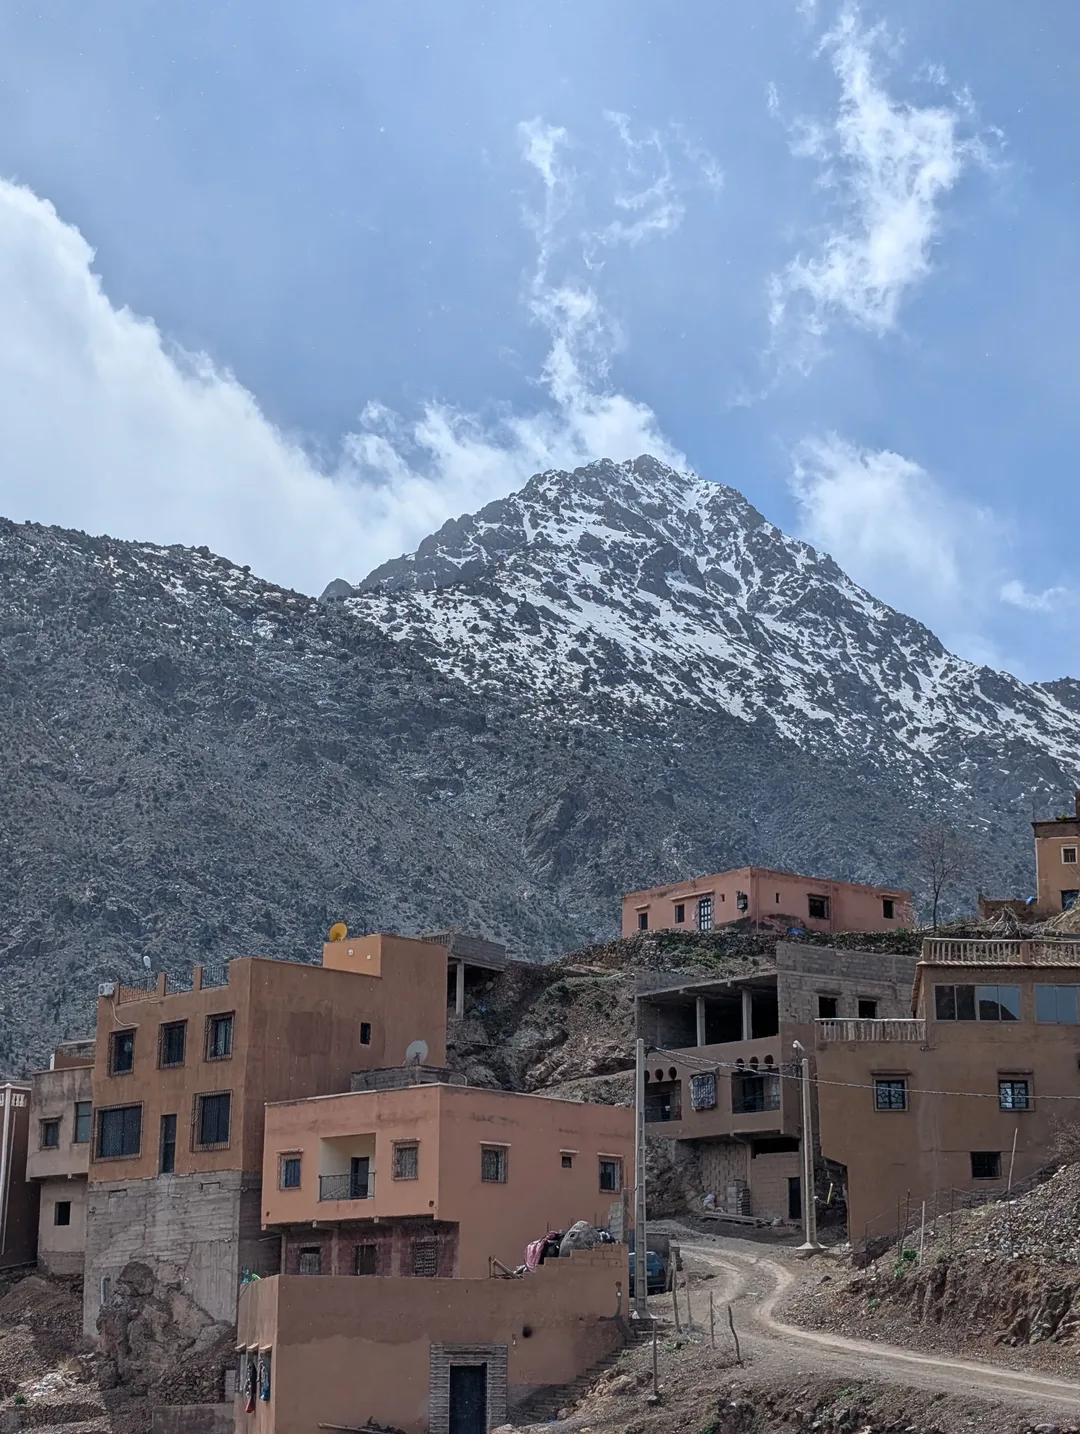
One of the lower peaks around Imlil.
Day 1 - Imlil to Refuge Les Mouflons ~ 6 Hours
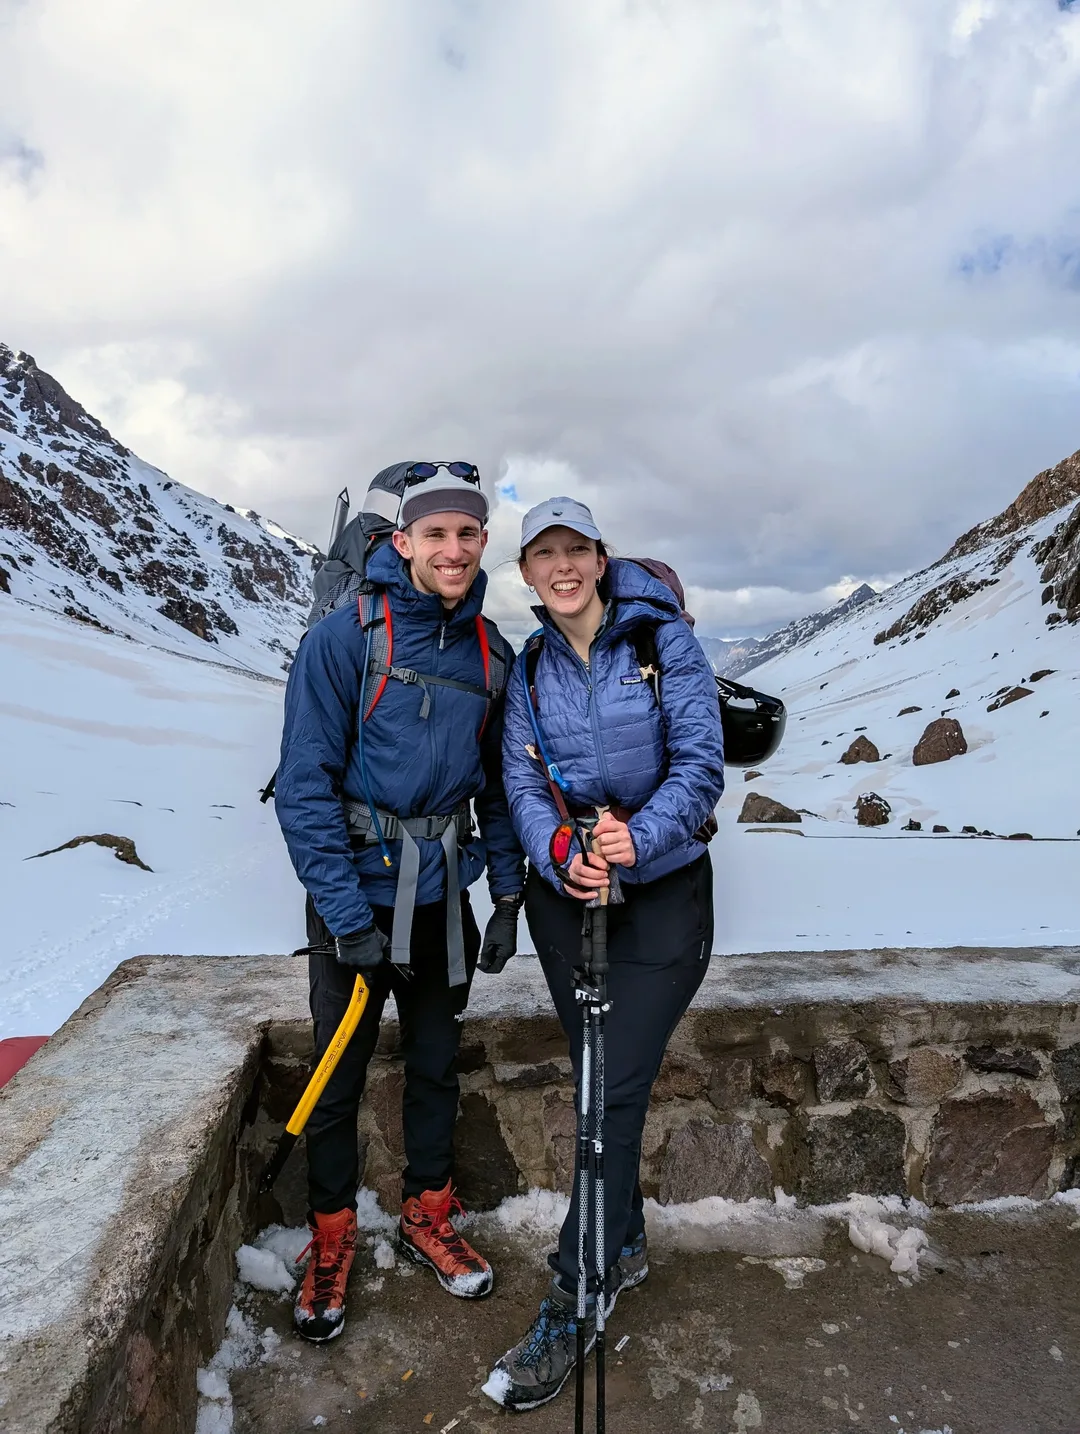
By Sunday morning, after a big breakfast, we packed our bags and were sad to have only spent a night at the homestay. We headed out to meet our group - our slight issue was that, given we weren’t starting in Marrakech, we would have an additional 2.5km trek to the meeting point. With our big rucksacks and an additional duffel bag for after the trek, it made for a good warm-up.
Speaking of luggage, in the summer months, mules carry bags to the refuges, meaning trekkers only need to carry a small daypack. When there’s snow on the ground, that gets a bit trickier. Our guide told us that there would be no mules on the mountain. This was not strictly true, because we saw mules – though I don’t think these were going all the way to the refuge. Still, we had planned to carry everything (sleeping bags included) because we like making our lives difficult a challenge.
Trying to hide how out of breath we were by the time we got to the meeting point, we were introduced to our group and guides over another mint tea. You’ll notice a theme with the mint tea.
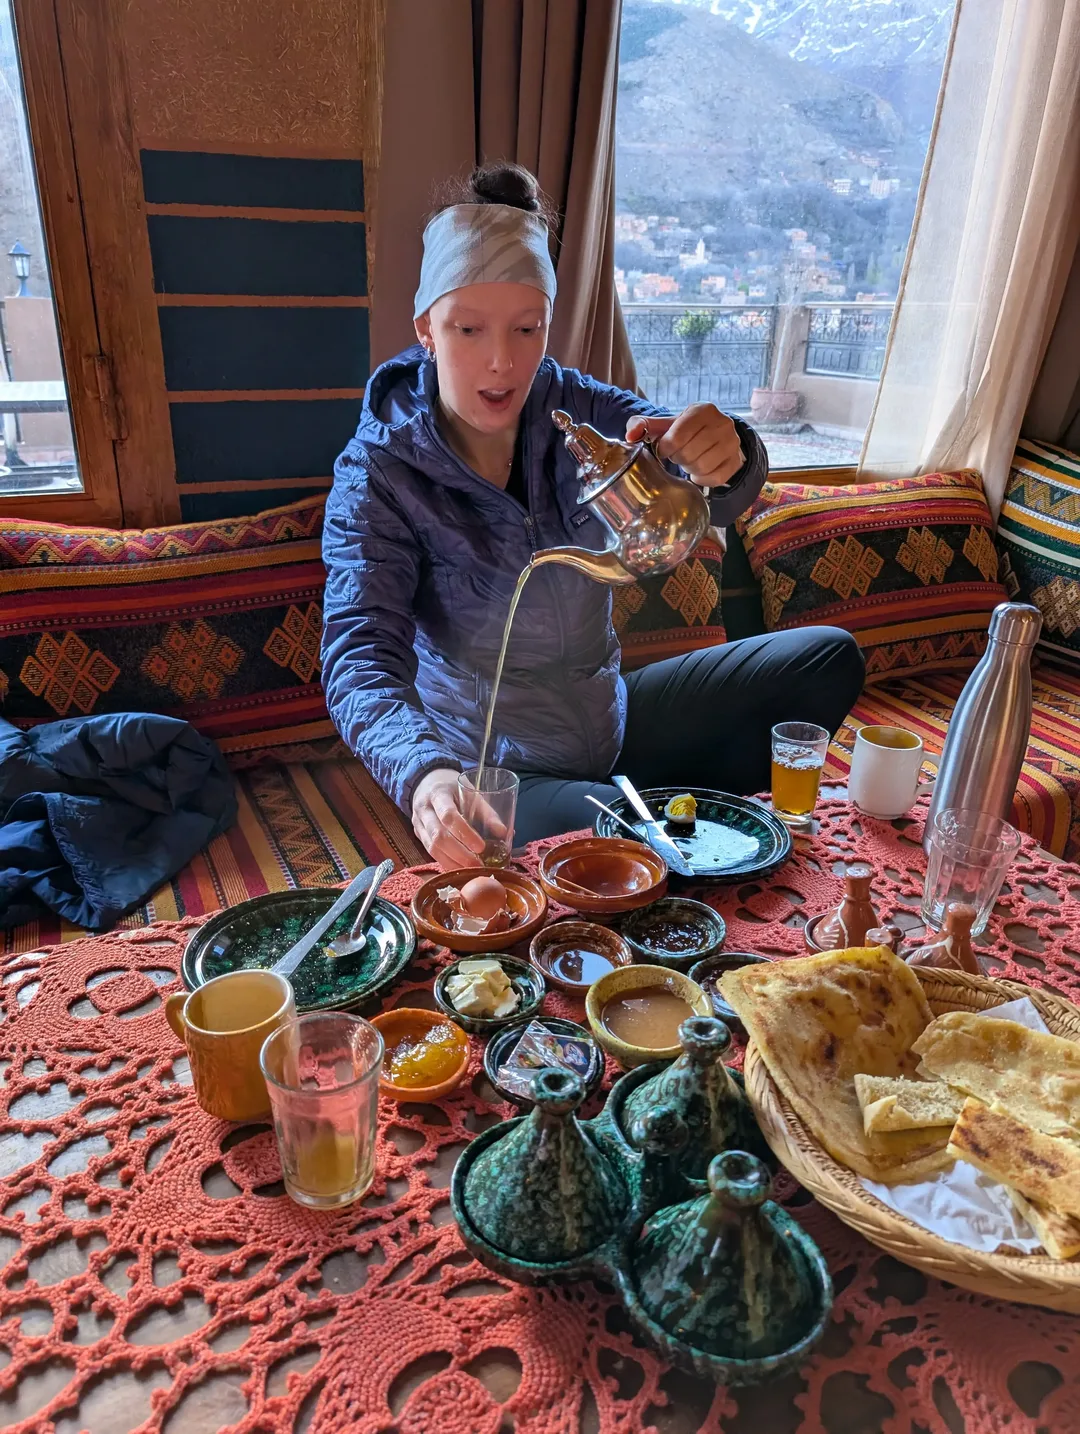
One of many mint teas on our trek.
After a short briefing, we dropped off our duffel and set off out of Imlil. The path was gradual at first, passing the small village of Aroumd and along a riverbed, crossing the meltwater trickling down from the peaks above.
Before long, we reached the police checkpoint, where our guide disappeared with our passports. After a short while, he re-emerged, and we were given the go-ahead. The path continued, as before, hugging the side of the valley with a gradual, but constant incline all the way to Sidi Chamharouch, a shrine and settlement on the trail.
The site is home to a large, white-painted boulder, which is said to mark the tomb of a holy man. Unbeknownst to us at the time, this is a sacred pilgrimage site for locals. Here we stopped for lunch (and more tea), provided by the guide company – this consisted of plain pasta, lots of vegetables and some sardines. A rogue combination, but the carbs were much needed.
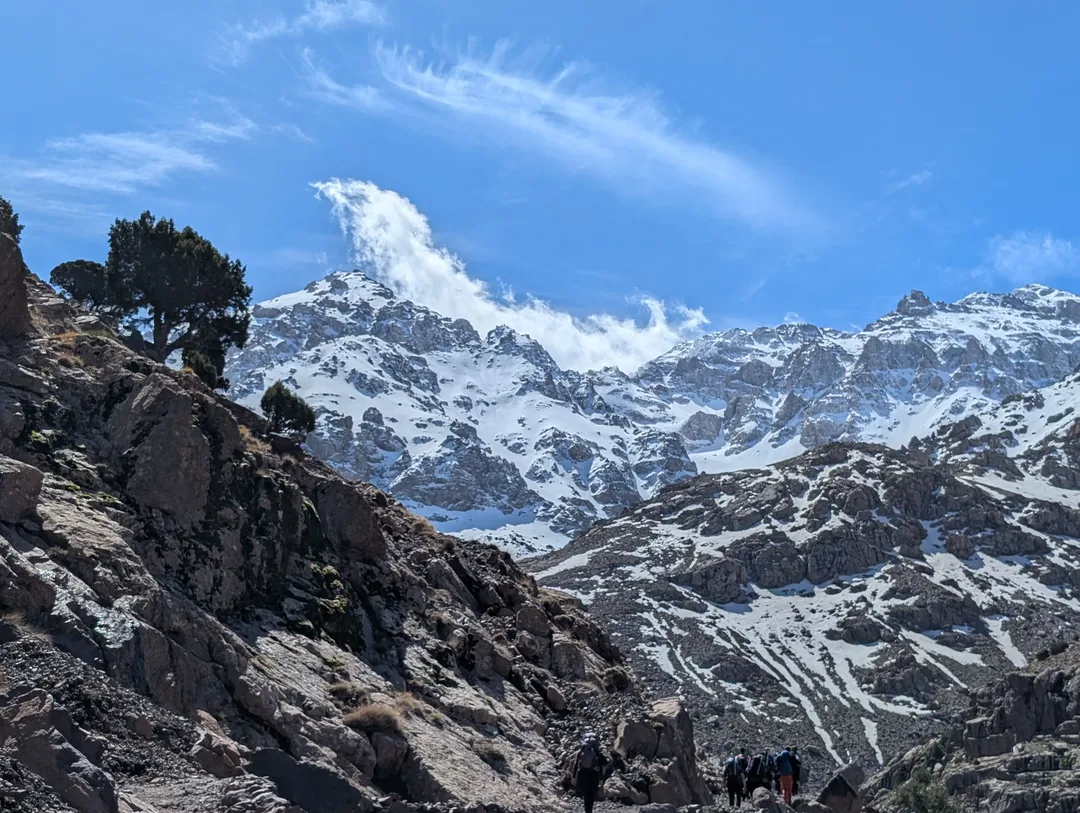
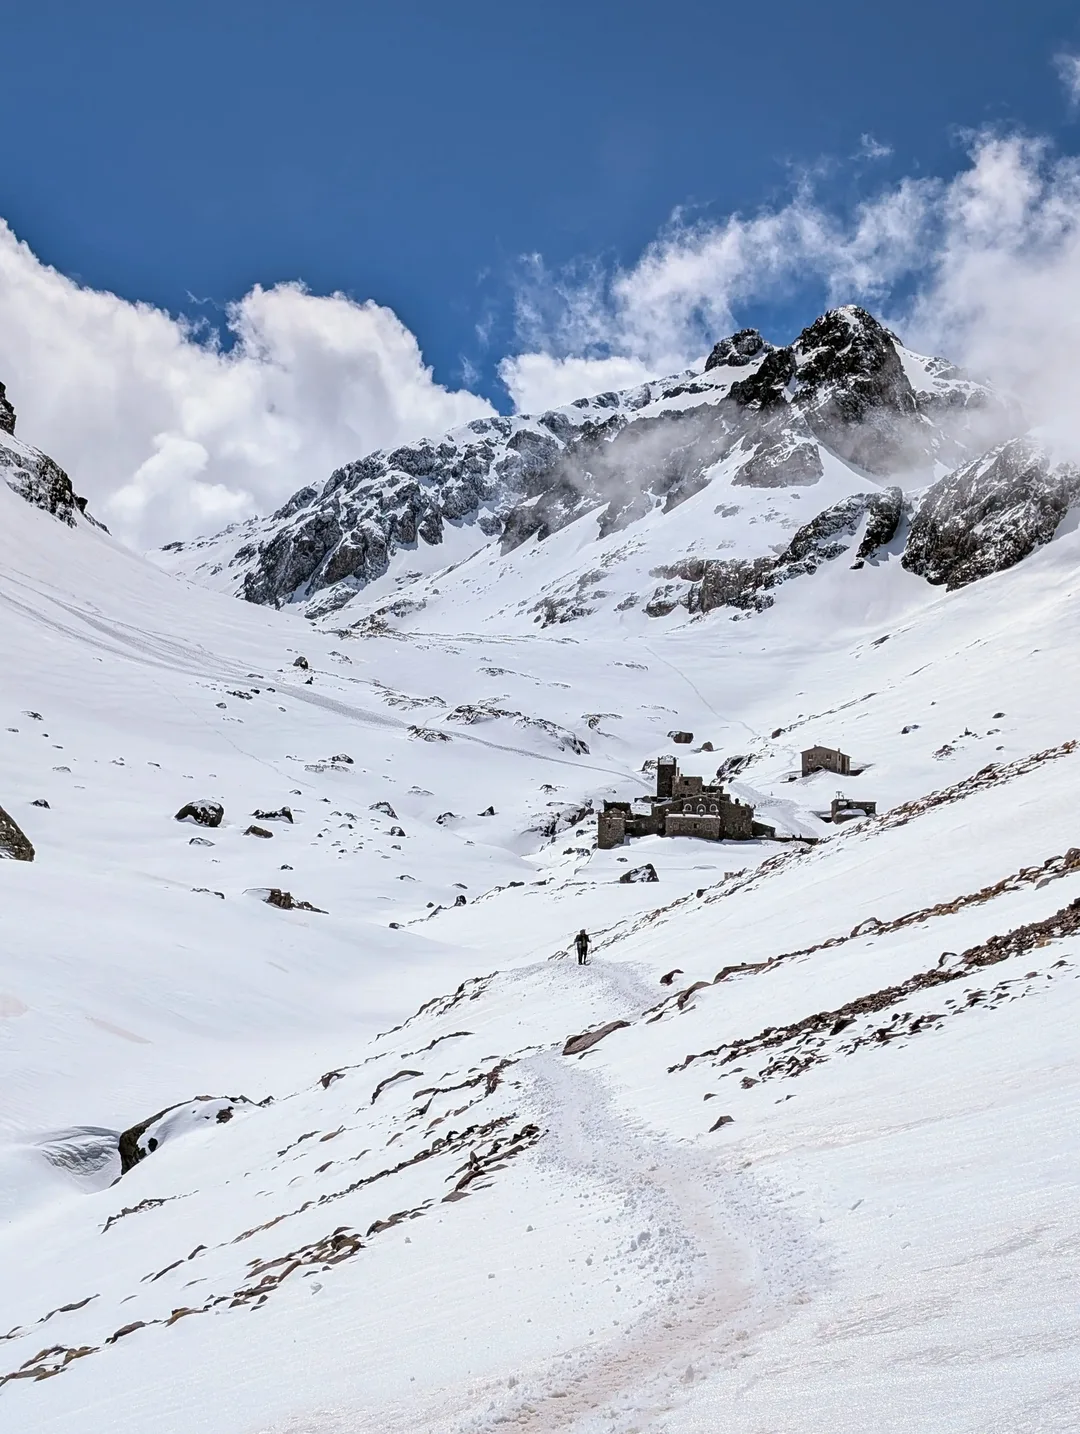
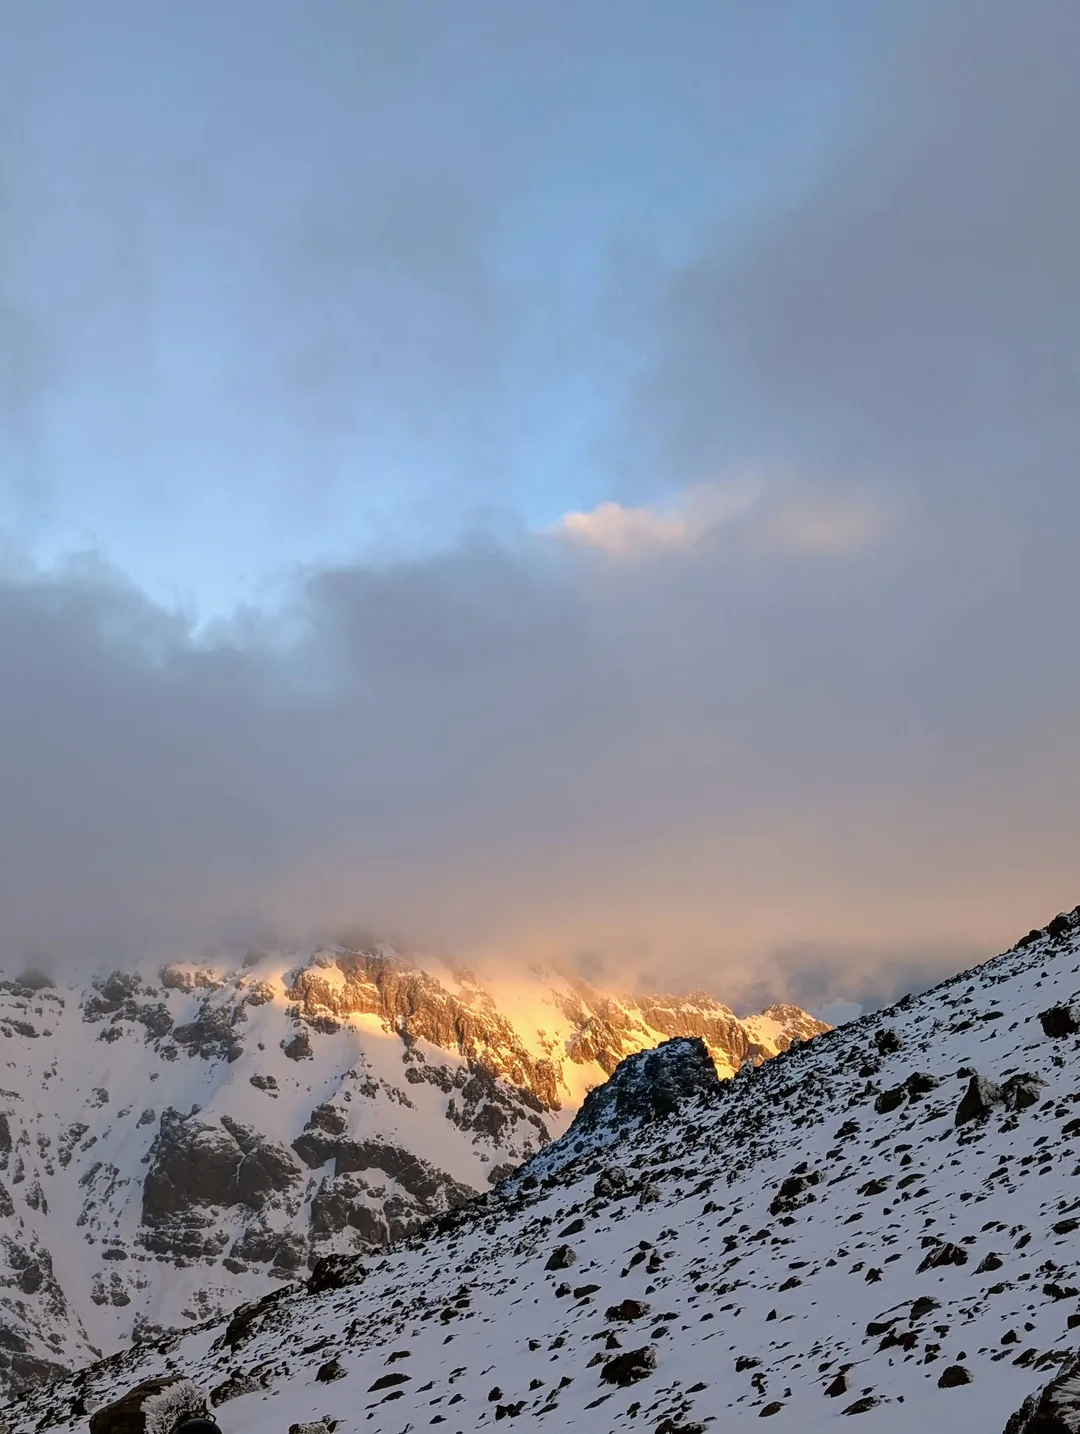
From here, the route climbed sharply away from the buildings of Sidi Charmharouch, bearing south-west as the valley dog-legged up towards the refuge. For us, this marked the start of the snow. This was all traversed without crampons – in hindsight, we should have stopped to put these on, as it was very slippery at times. The guides likely didn’t want to stop the whole group to put crampons on. The consequences of a slip at this section of the route wouldn’t have been catastrophic, with the snow being very soft, so we ploughed on.
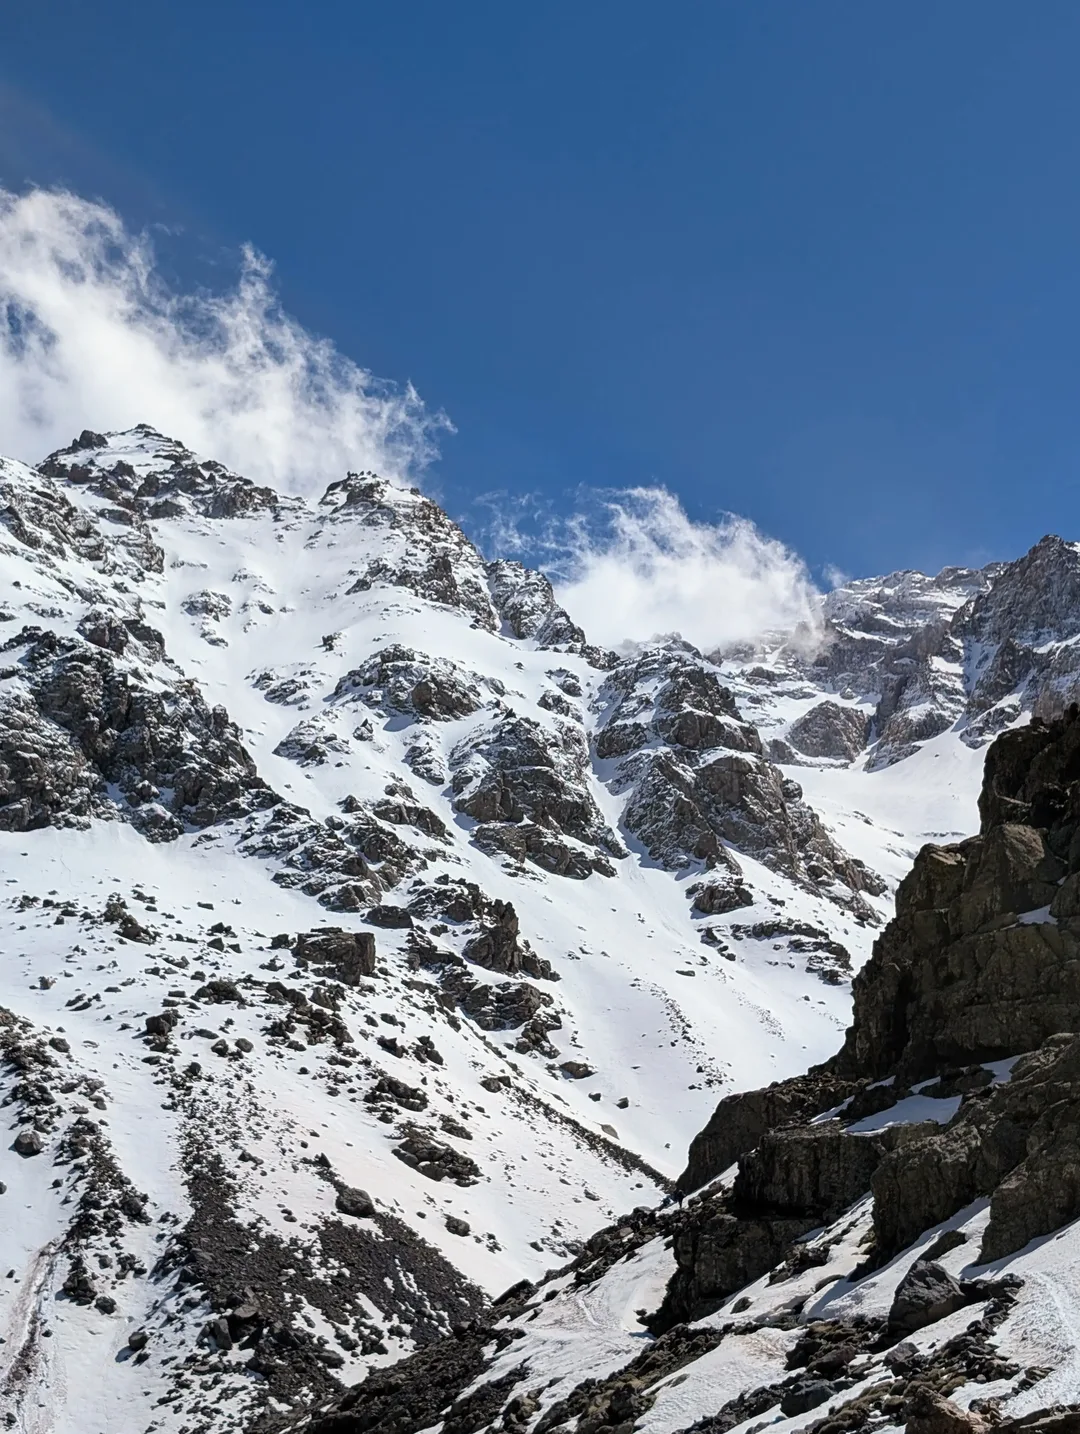
Snow from the path above Sidi Chamharouch.
It was clear that there was a lot of snow on this upper section of the mountain, even in late March, with snow drifts stacked high against the refuge buildings when we reached them.
I had developed a good headache by the time we arrived at Refuge Les Mouflons, which sits at 3,200m. At one of the earlier stops, my head had become acquainted with the low door frame of one of the toilets (read: “hole in the ground”). I wasn’t sure if my headache was a symptom of the altitude or if I had concussed myself. I tried not to think about it too much as we sat down for dinner and made sure to keep drinking lots of water.
Discussion at dinner that evening, by the warmth of a roaring fire, would turn to the deaths of three people on the mountain. In January, an avalanche claimed the lives of one guide and two tourists. On the walk up, there had been clear evidence of a recent avalanche, the snow still showing signs of having slipped. The dangers of the mountain were all too apparent. Toubkal is generally non-technical, but the mountains always carry risks.
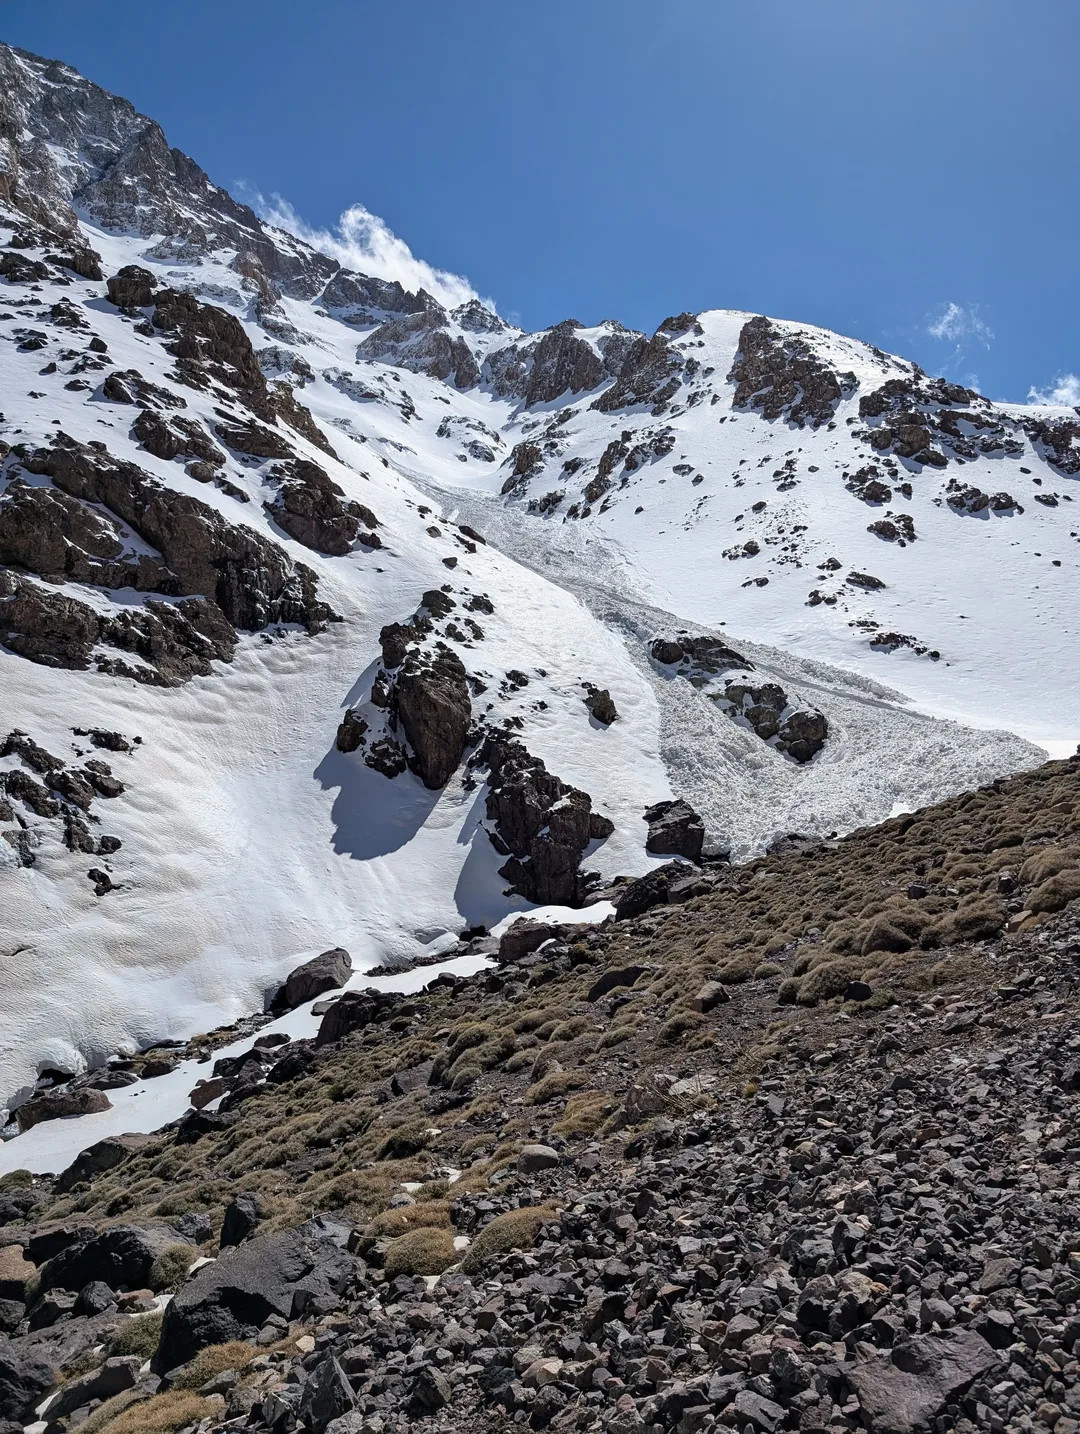
Signs of a recent avalanche en route.
After dinner, which consisted of more pasta, some bread and chicken, we headed up to the dorm for an early night. The whole group was in one room – with one long bunk across the back wall and two smaller bunks by the door. We drew the short straw and ended up sleeping on the top bunk, but there was plenty of space and it didn’t feel like we were squished up too much. The refuge was a lot better than I was imagining overall – there were even flushing toilets!
We bought -5°C sleeping bags, on the advice from countless websites that the refuges are cold. However, as I tucked myself away in just underwear, I was absolutely sweltering. Perhaps Les Mouflons is warmer than the CAF refuge, but we definitely could have gotten away with thinner sleeping bags. Still, better too warm than freezing I suppose.
Us at the snowy refuge.
Day 2 - Refuge Les Mouflons to Summit ~ 5 Hours
The alarm went off at 3 am the next day, and the 4 hours of sleep hadn’t done wonders for my headache. Breakfast consisted of, yes, more tea and some stale/frozen bread. We got packed up, having dumped what we could from our big bags at the refuge to minimise weight, donned crampons and headed out the cast-iron doors to wait in the snowy courtyard outside.
There had been a fresh dump of snow overnight, and as we stood waiting for everyone to get their crampons fitted, someone pointed out lightning on the horizon. Huge bolts of lightning were lighting up the cloud base in the distance. We couldn’t hear the thunder, so it must have been far away, thankfully.
By the time we set off into the darkness, light snow had started to fall, and I didn’t have high hopes of reaching the summit. Three of the previous four days had seen no summits due to high winds. As we set off in single file, though, my thoughts turned to the victims of the avalanche, and my focus shifted to making sure we got back safely – summit or not.
The push to the summit started gradually but quickly became steep as we zig-zagged our way up the wide gully in the dark. Thankfully, it stopped snowing, and there were no more signs of lightning. We were initially near the front of the train of head torches, with the guides up front doing an excellent job of breaking the worst of the trail. Still, being near the front of the pack meant moving through fresh powder as we made our way up, adding to the challenge.
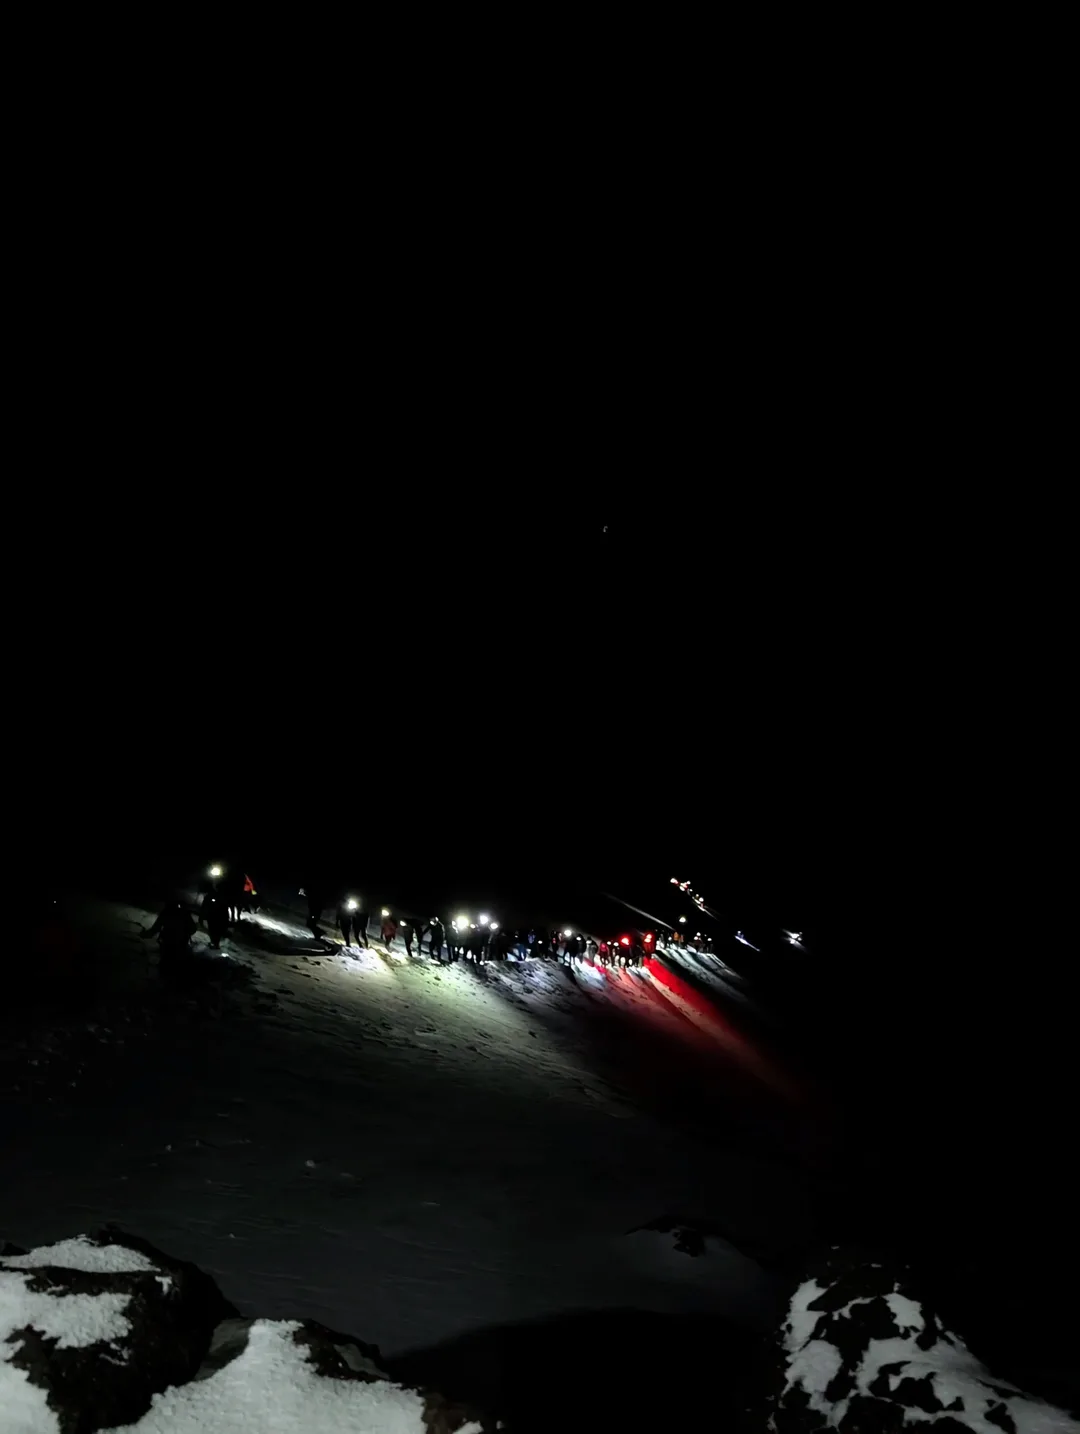
Trail of head torches on the ascent in the dark.
Pace was slow and steady, and I was sure to keep sipping from my CamelBak to stop it from freezing. This worked for a while, but before long, the tube succumbed to the frigid early morning air and froze solid.
By the time we reached the halfway point, just below a corrie beneath the summit, the morning light had started to break, shining its orange glow through the dense cloud cover above. As we forked right, away from the corrie and towards a col in the ridge between Toubkal and Toubkal West, it looked like we would be walking into a whiteout. By this point, I was feeling quite good – the early morning grogginess had worn off, and the morning light had given me a second wind.
After reaching the col, the route takes a hard left, staying far from the heavily corniced edge, for the final push to the summit. My brief moment of feeling good hadn’t lasted very long, and this last section felt like a real slog – with the pace of the whole team slowing (which I wasn’t complaining about). I would take a few steps forward, stop to breathe what little oxygen I could, before taking a few more steps and repeating the process. It’s safe to say that an extra day of acclimatisation would have been much appreciated.
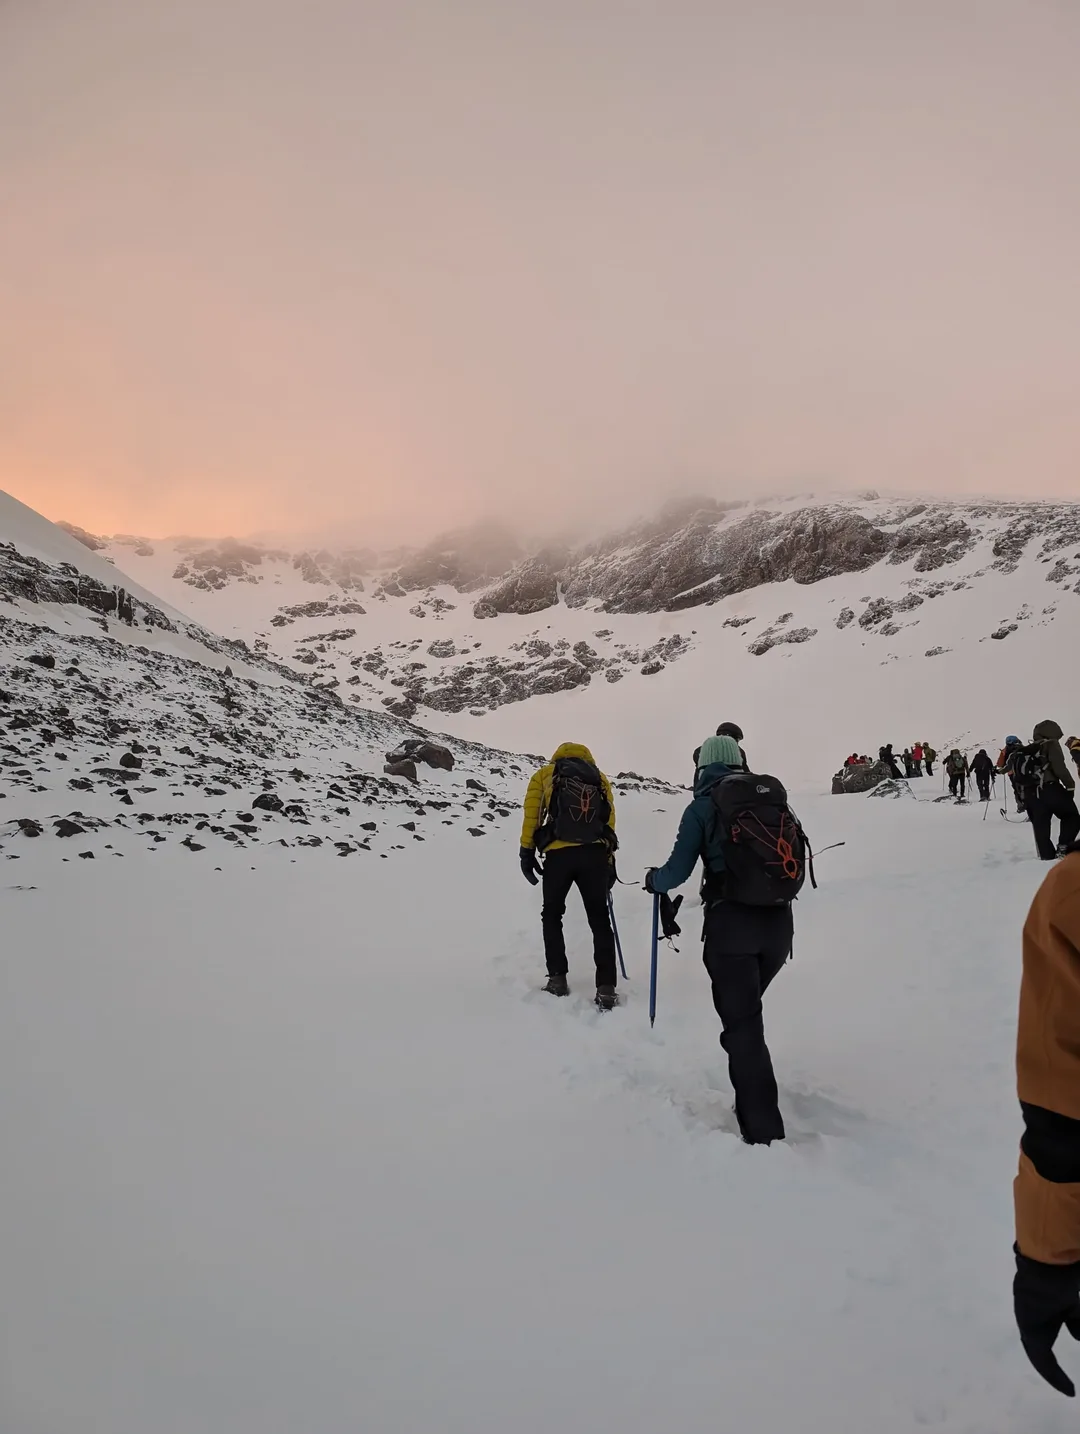
The dense clouds being illuminated by the rising sun, as we walked into a white-out.
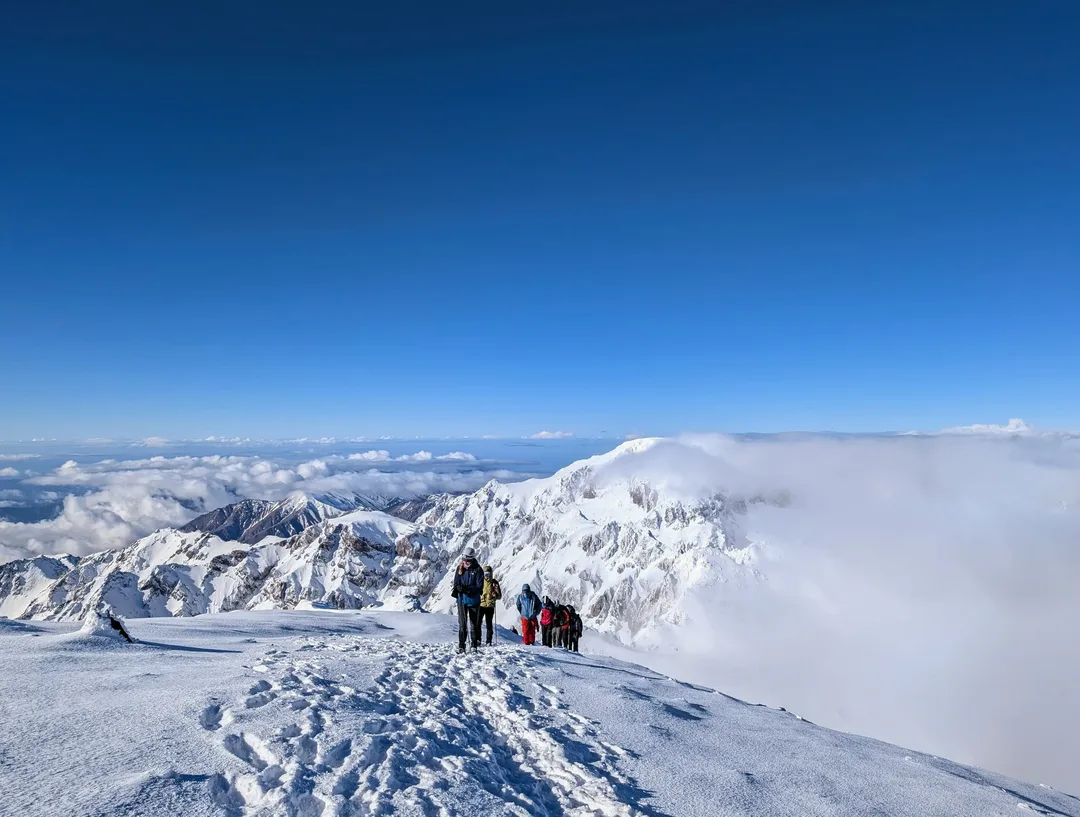
Being so focused on my breathing, I hadn’t appreciated the changing scenery around me. I stopped to turn around to check on Ros, and suddenly – the view behind me opened up, the dense cloud still clinging to the west side of the mountain but clear blue skies above, with views out over the snowy Atlas Mountains to the east.
The time to ogle at the view was not now, though, with the final section to the summit being the most exposed and serious, as we traversed above the corrie we had been heading towards earlier. A fall or slip here would have had serious consequences - this was the point where I was most glad to have an ice axe. The boot pack was very narrow here, clinging to a relatively steady incline on an otherwise very steep slope – this was only wide enough for one person at a time. Because we were towards the front of the train of climbers, there was no boot-packed trail on the return yet, so the first climbers coming off the summit met us head-on at this precarious section, causing some confusion.
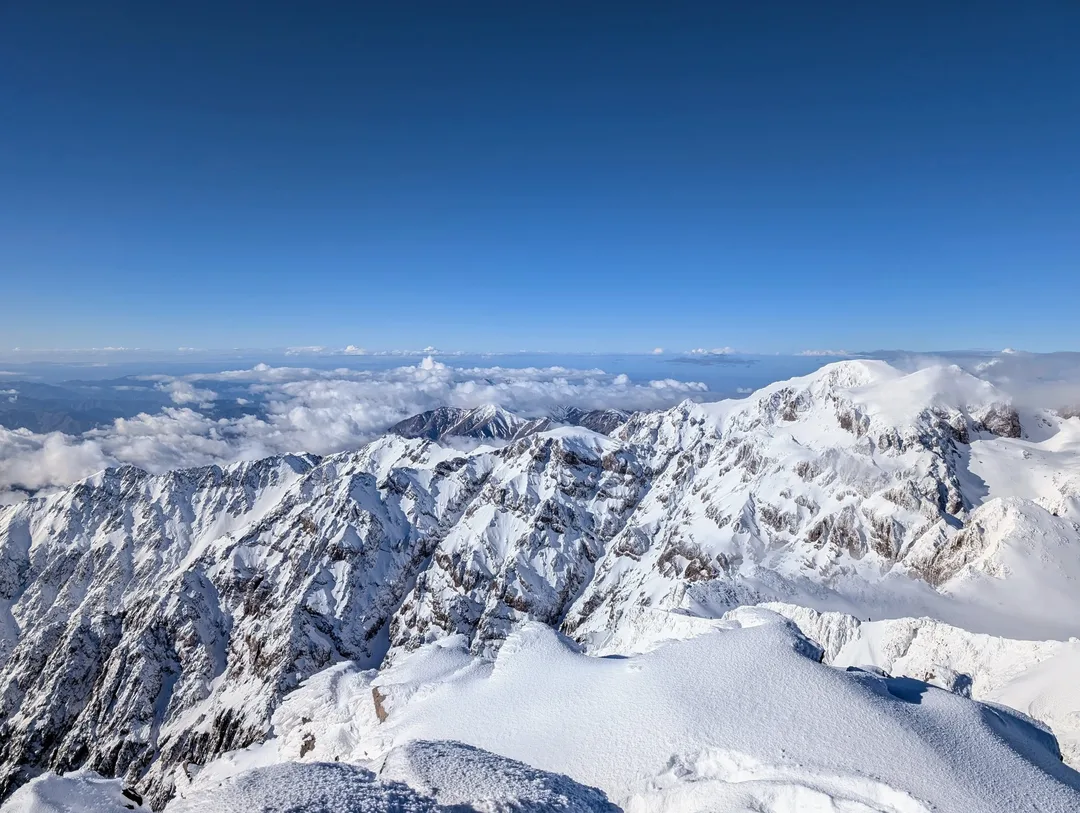
After a few precarious steps, we were all safely over this exposed section and on the final walk to the summit. Now we could enjoy the views, which stretched out to the east over the Atlas Mountains, with the yellow glow of the Sahara Desert in the distance. Back to the west, the cloud cover was firmly in place, obscuring much of the ring of peaks around the Refuge that comprise many of Morocco’s 4,000m mountains.
Above the clouds on the final ascent to the summit.
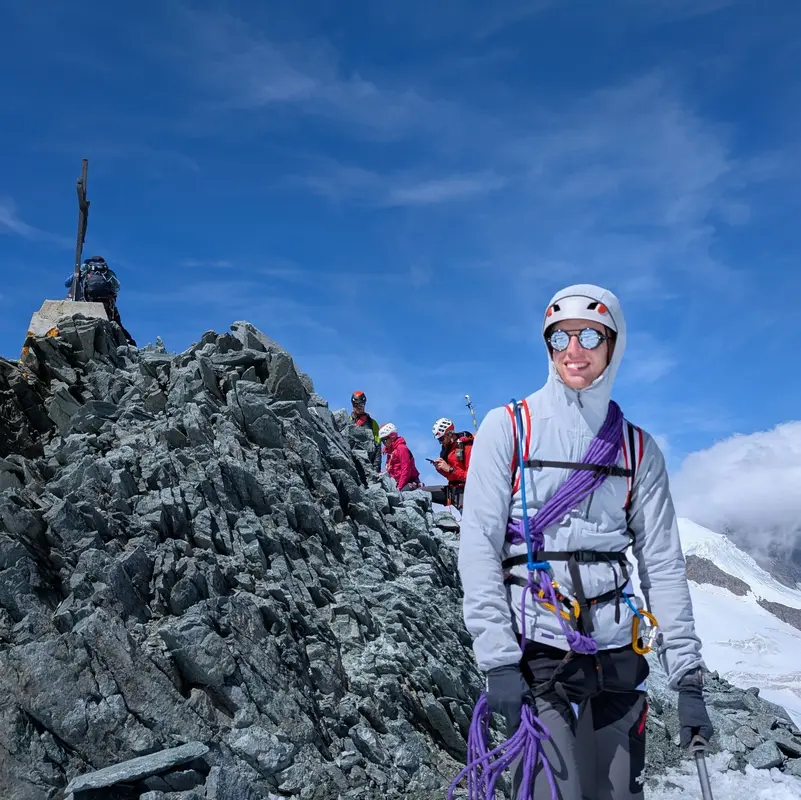
It was bitterly cold on the summit beside the iconic metal pyramid that marks the top of Morocco. The mountain forecast in the days leading up to the climb had been quoting -20°C with wind chill, and I could believe it. I quickly pulled a down jacket over my shell to try to hold on to some warmth as I snapped a few photos. After about 15 minutes, we were all ready to head back, my hands feeling very numb and in need of some movement.
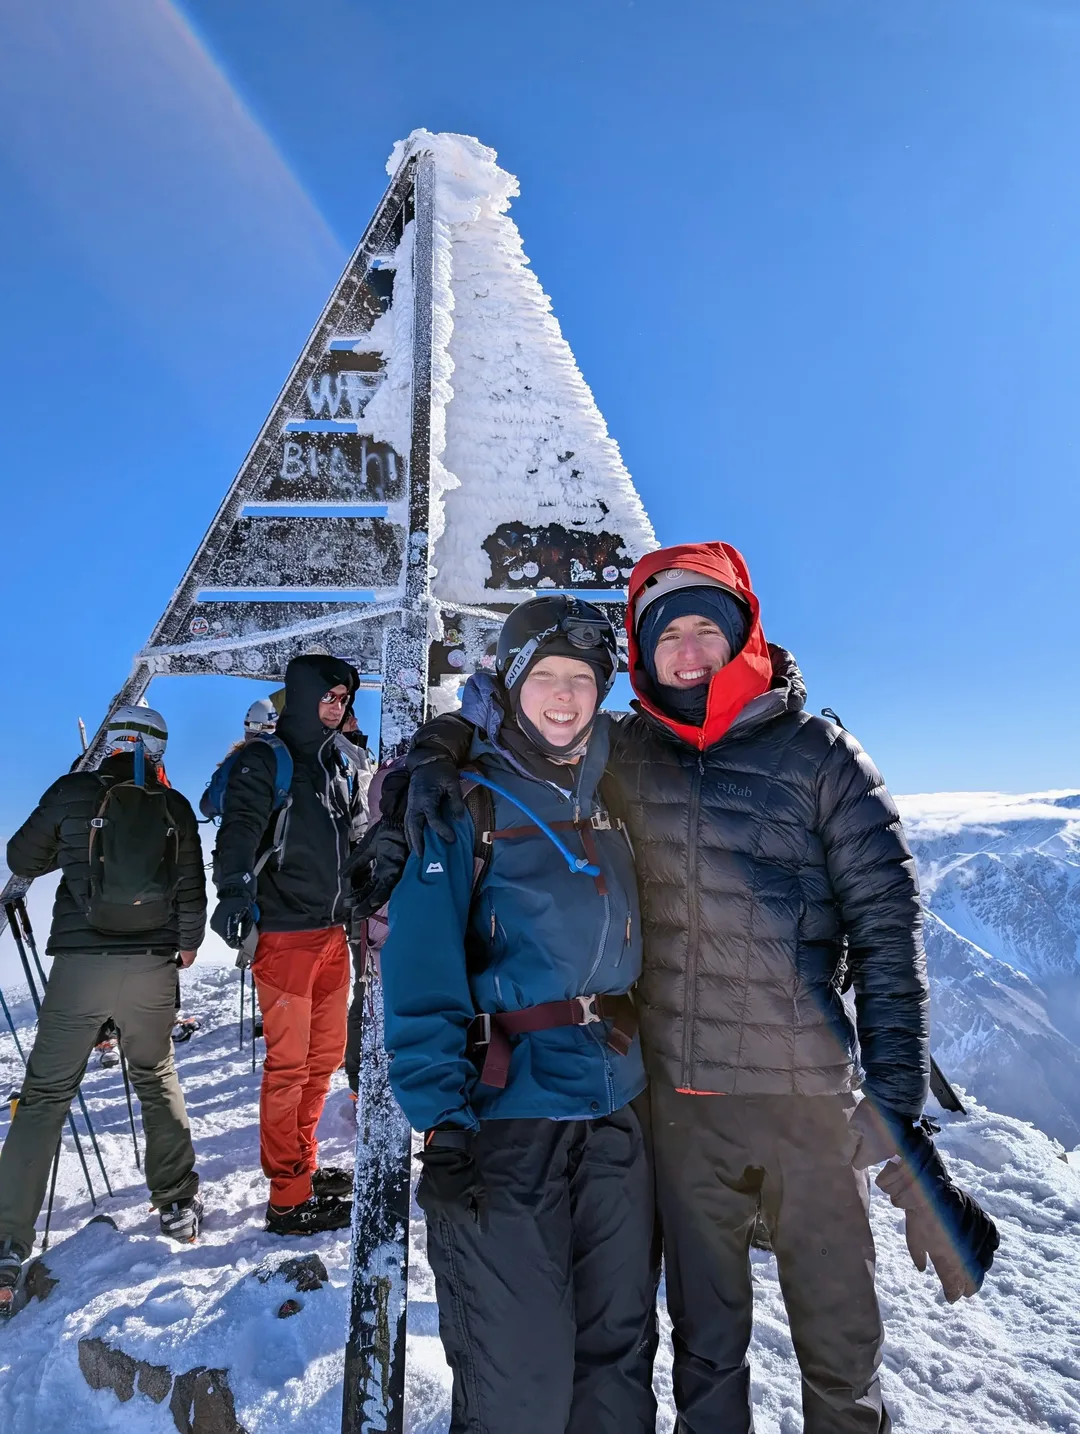
On the Summit!
Day 2 – Summit to Imlil ~ 2 hours to refuge + 4 hours back to Imlil
The return route followed the ascent, back down above the corrie, where an alternative descent route had now been worn. Still exposed, but at least we didn’t have to navigate oncoming climbers. By the time we reached the col, there was a clear zig-zagging boot pack from the ascent; however, we took the quicker option and cut straight down the slope. The previous night’s snow dump had made this relatively easy, with enough deep snow to provide resistance on the descent as we waded down through the knee-deep powder.
We stopped at the refuge again for lunch and to repack our bags, before making the remaining long 1,500m of descent back down to Imlil. This was brutal on the knees and felt never-ending, but after about 4 hours, we made it back, shattered.
Leaving the Toubkal Refuges behind.
I slept for most of the mini-bus ride back to Marrakech and by the time we arrived in the mayhem of the city centre, the sun was starting to set. Huge lightning bolts lit up the sky in the distance again, just as they had at the start of the day. Navigating the hectic streets of Marrakech was our final challenge for the day; everything felt overwhelming after the quiet of the mountains. When we eventually reached our riad for the next few days, we collapsed into bed – exhausted from a full day, but very proud of ourselves.
Climbing Mount Toubkal was certainly a challenge, and the ascent felt like a mission at times. In hindsight, a smaller group or an extra day for acclimatisation would have made the experience more enjoyable. That said, the Atlas Mountains are beautiful and offer something genuinely unique. This is especially true in the winter months, when climbing to 4,000m remains relatively accessible compared to Europe, where similar peaks demand far more experience. It’s a summit that feels properly earned - one that has already got me thinking about other climbs in the range.
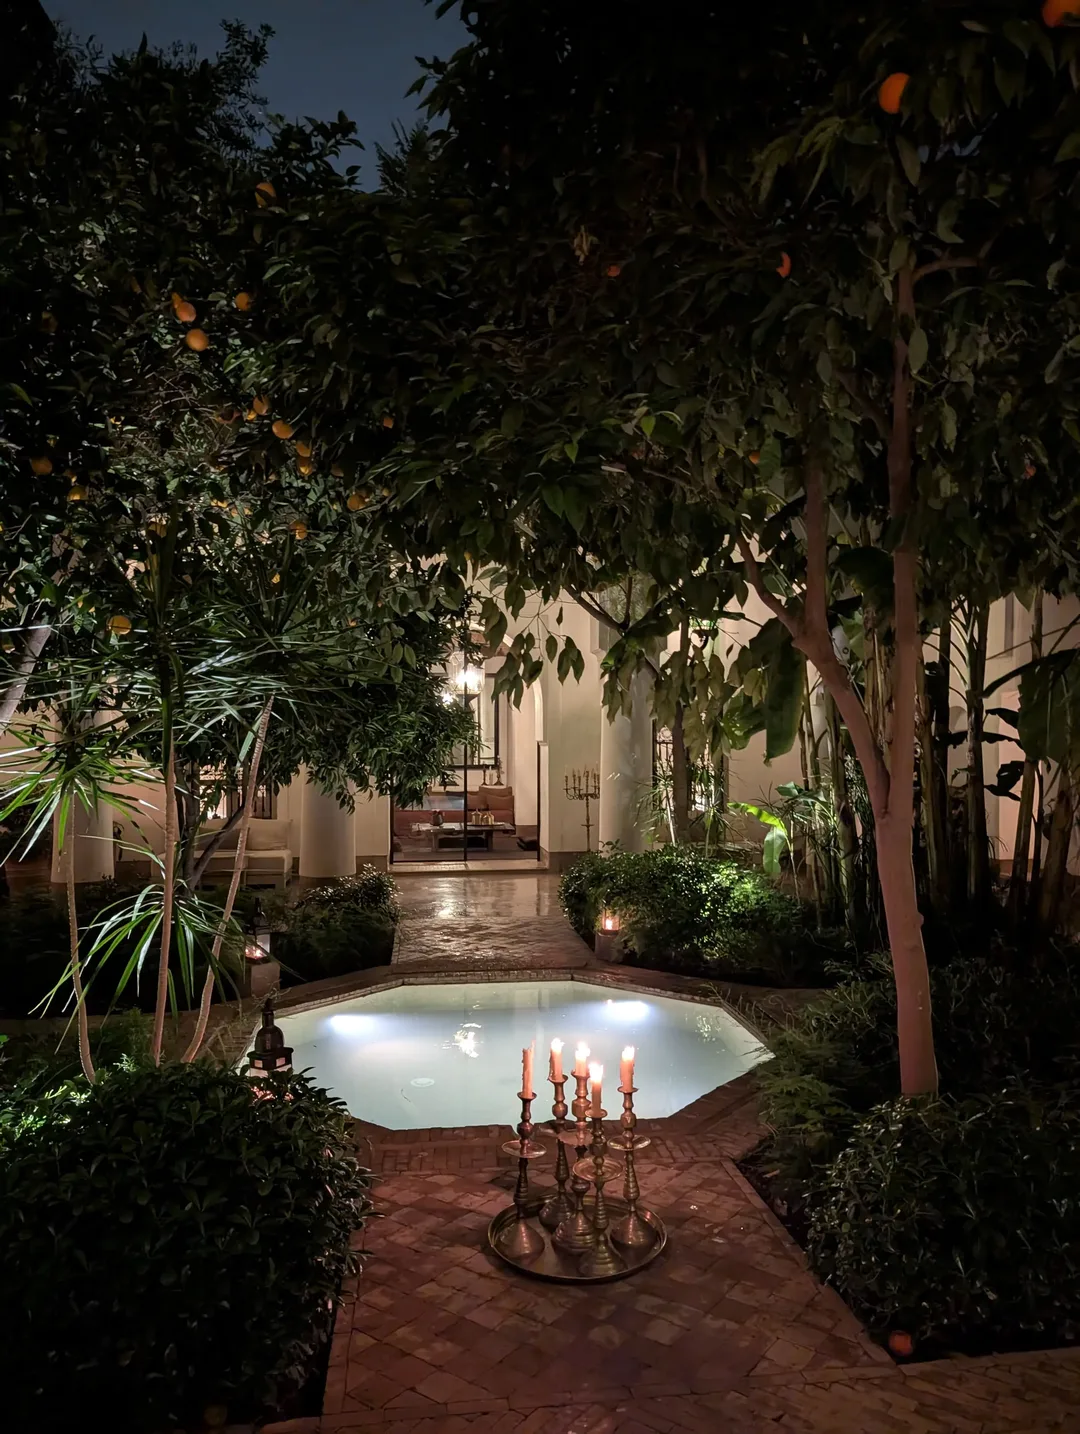
Our riad in Marrakech, seen briefly before passing out in bed.
Atlas Mountains - A Brief History
In Greek mythology, the Titan Atlas was condemned to hold the sky up at the western edge of the world. According to legend, his petrified remains would later form the Atlas Mountains.
Today, we know that the range does not sit at the edge of the world but instead forms a natural barrier between the Sahara Desert to the south and the Mediterranean Sea to the north. Geologically, the Atlas Mountains once formed part of the Central Pangean Mountains. These were later split by continental drift into ranges including the Atlas, the Appalachian Mountains, the Massif Central and the Scottish Highlands.
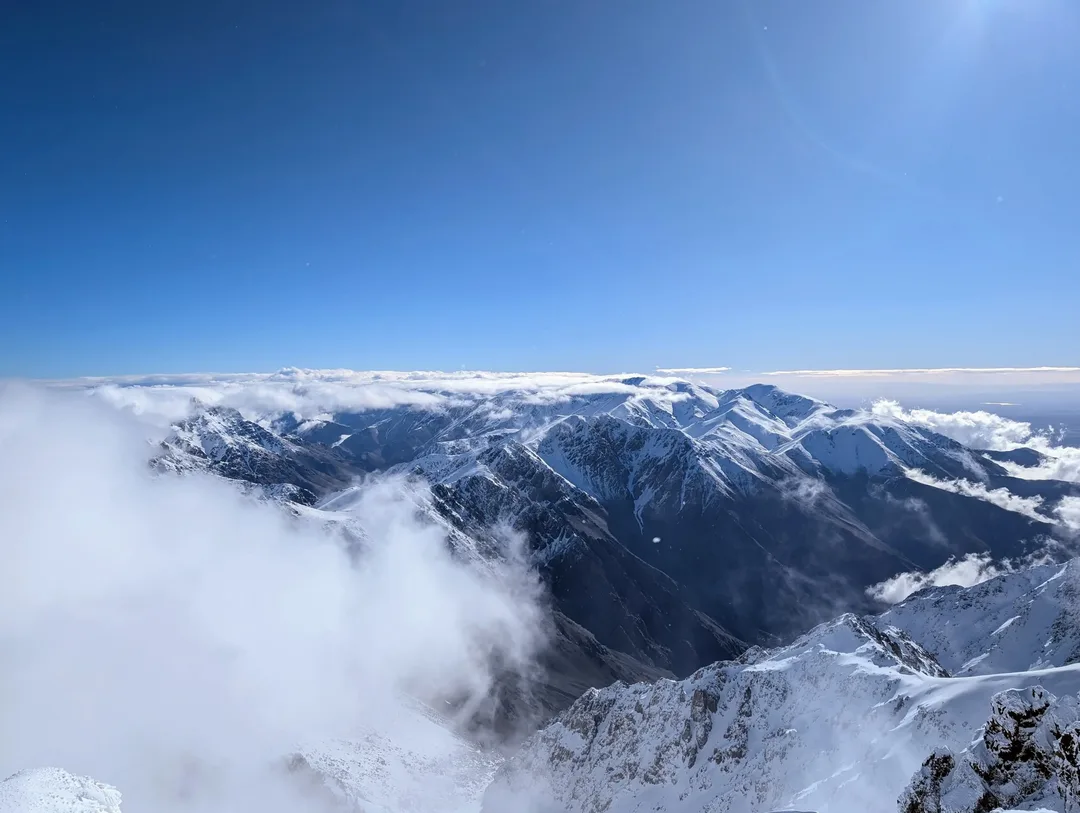
The Atlas Mountains from the summit of Toubkal.
Planning a Trip? - Some Practicalities
GPX Route
This GPX route was recorded by us during our climb (as is reflected on the 3D route map). Mountain conditions can change, so treat this as a rough guide rather than a precise plan. You need a guide to climb Toubkal anyway (see below), so they will typically handle navigation, though it never hurts to have an idea of where you’re going. Always prepare carefully and follow local safety guidance.
How to Get to Imlil
Map of start point above - click "Open in Maps " to open Google/Apple Maps and get directions
Imlil is approximately a 90-minute drive from Marrakech Menara Airport. If you are joining a tour, as most people will, then the tour operator will usually provide transfers from Marrakech.
If you’re organising a guide yourself or want to spend some time in Imlil beforehand to acclimatise, as we did, then your best option is probably to take a taxi. You can expect to spend around 400 Dirhams, though a bit of haggling goes a long way. We pre-arranged our airport transfer with the lodge we stayed in, which made the whole experience smoother.
You can hire a car, but parking is hard to come by in Imlil, and the roads aren’t great. Unless you have plans for an extended road trip, I wouldn’t recommend it.
How Difficult is Mount Toubkal?
An ascent of Toubkal is non-technical – i.e. you don’t need to use ropes or know climbing techniques. If climbing in winter, some experience using crampons and an ice axe would help. Guides on shorter tours will generally not spend much time (if any) instructing you how to use an ice axe and will attach crampons for you rather than explaining how to. This feels a bit sketchy; you should at least know how to self-arrest. Longer winter tours position themselves as an intro to winter mountaineering and will spend a day or two training you on the basic skills.
Most active people will be able to climb Toubkal, but it is certainly not easy, and for many will be one of (if not the) hardest physical challenges they have undertaken. Altitude is the biggest factor (see “Altitude” below), so the better your cardiovascular fitness, the better experience you will have.
A summer ascent would be easier because you can carry fewer layers, make use of mules to carry luggage and don’t have to navigate snow (see “Best Time to Climb” below). Still, the ascent will be a challenge.
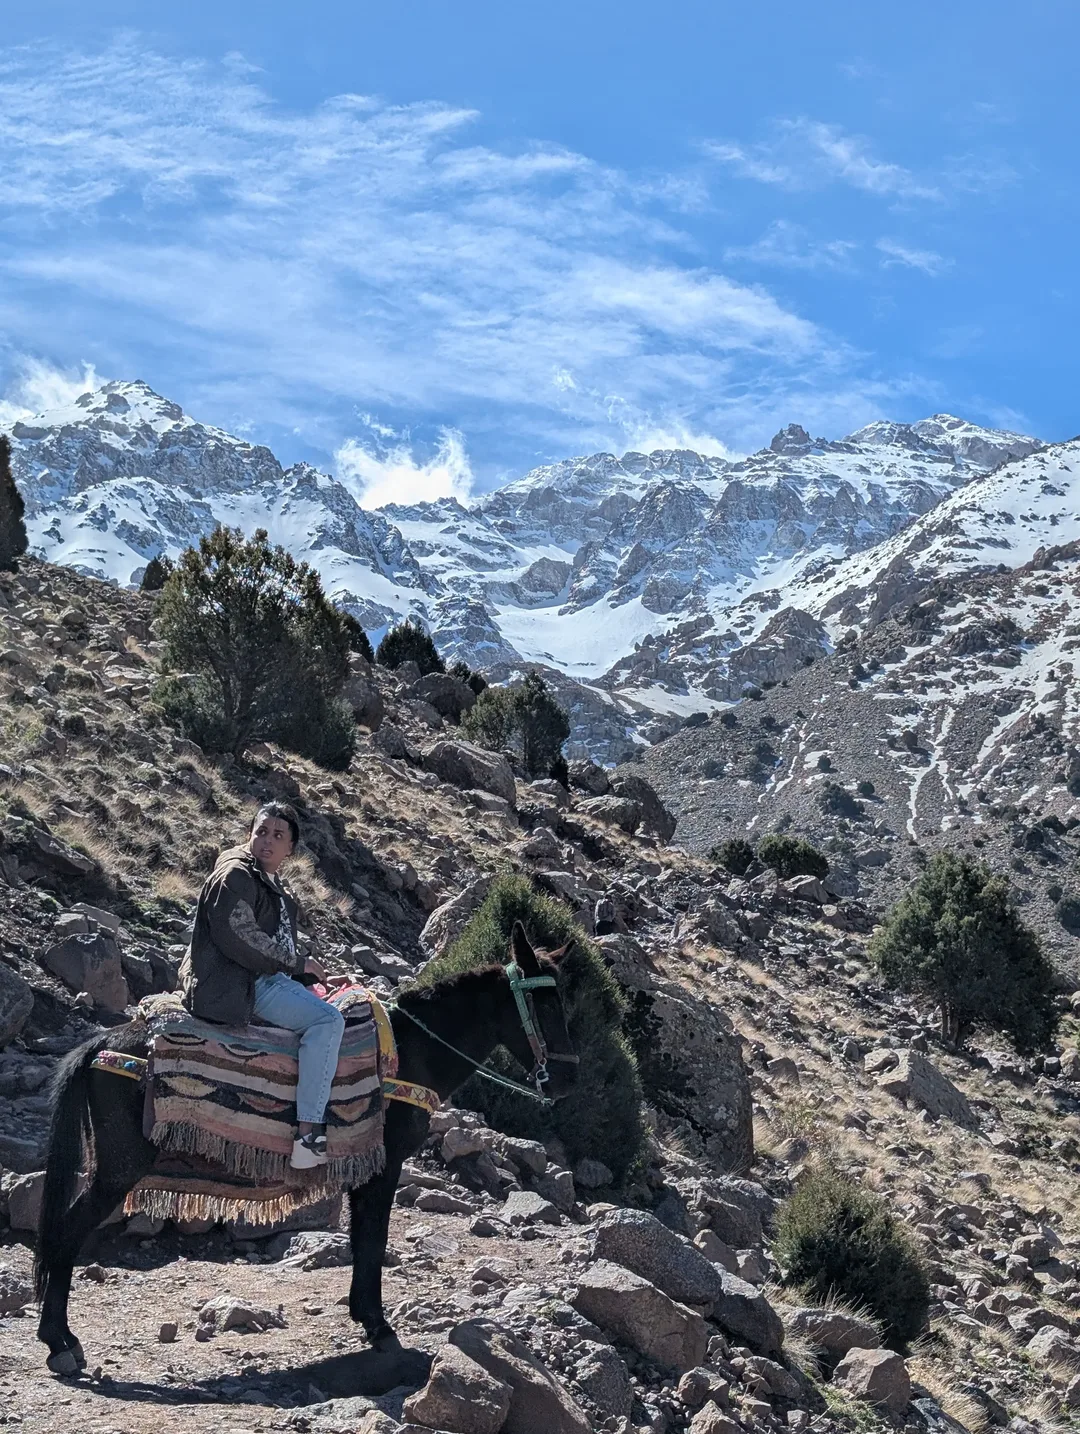
A mule en route to the refuge.
Best Time to Climb Mount Toubkal
A summer ascent of Mount Toubkal is likely easier - no snow means that crampons and an ice axe aren’t necessary and you can make use of mules to carry the bulk of your gear to the refuge. However, the ascent to the summit would essentially be a scree slope and the trails are likely to be busier.
The first snow typically falls in late October/November and persists through to March. As we found out, there can still be a lot of snow in March. The winter season means ice axes and crampons are needed and turn a high-altitude hike into winter mountaineering. If there is snow to the refuge, then you will likely have no option of using mules to carry gear. However, the snow-covered Atlas Mountains are stunningly beautiful and though harder in winter, it was extremely rewarding.
For most people, summer will be the best option, with winter months being best for those seeking to really challenge themselves or get some mountaineering experience.

Still lots of snow in March.
Mount Toubkal Weather
Whilst the summer months are generally dry, the temperature can still drop substantially at night. In winter months, snow is common, and temperatures are often sub-zero from the refuge (3,200m). Whilst the majority of the ascent is sheltered on day two, the final stretch to the summit is exposed (naturally – it’s the highest point) and so wind chill can be significant. When we summited it was -20°C on the summit with wind chill, so make sure you have enough layers.
Mountain forecasts can give you a rough idea of the weather, but treat them with caution and prepare for all reasonable outcomes. The forecasts predicted rain on our ascent – day one was fully dry, whilst day two saw all four seasons – cloudy on the initial ascent, sunny, then hail and rain down towards Imlil.
Often, more important than the weather on any given day is the snow conditions, or rather, if there is any. Recent social media posts are helpful for this, but bear in mind people don’t post straight away. Webcams are always a useful way to check the ground conditions. The webcam below is from Oukaimeden Observatory, which sits at 2,750m, about 16km (as the crow flies) from Toubkal.
Oukaimeden webcam to give an idea of current ground conditions.
Do You Need a Guide for Toubkal?
Despite the non-technical nature of the climb, a guide is required by law to climb Toubkal. This is true even in summer. The law was implemented in December 2018 following the brutal murder of two Scandinavian tourists on the mountain by extremists. There is a police checkpoint en route where you must present your passport and be accompanied by your guide. You will not be able to progress past this point without a guide.
Whilst most tour operators or trip reports will brush past the fact that this is the origin of the guide requirement, I think it is important to be open. The event is not at all reflective of the attitudes of the locals. Quite the opposite – everyone we met was extremely welcoming, friendly and happy to see us – this is an economy that relies on tourism.
The guide requirement is beneficial for wider safety on the mountain, as there is limited mountain rescue capability in Morocco. You are not getting airlifted from the Atlas Mountains if you injure yourself. The guide requirement means that there is always someone around to help get you down the mountain safely.
The sun shining through the early morning clouds.
Further, the guides' local knowledge is invaluable in mitigating avalanche risk and generally avoiding unsafe conditions. It is not unheard of for guides to prevent groups from summiting during high winds or bad weather. Three of the five days before our summit day saw no summits due to high winds.
Saying this, the thought of having a guide can sometimes encourage complacency. The guides will do their best to keep you safe, but given limited time and often big groups, the experience may be less hands-on than expected. If you feel that you would be completely incapable of summiting the mountain without a guide, then you should probably get some more experience before attempting Toubkal. You should ultimately prepare to be self-sufficient within your group and remember that you are responsible for your own safety.
Final serious note – most trekking companies will require you to have insurance to climb Toubkal, but some might not. Regardless, you should ensure you have appropriate insurance before flying out to Morocco, lest the worst happens. Ensure that this covers trekking above 4,000m, potentially in winter conditions. Most standard travel insurance policies will not cover such activities, so specialist insurance is required. If you’re based in the UK, the BMC is a good option, which we used. Stay safe out there.
Accommodation
Unless you’re planning a very long (and brutal) single-day push, you will stay in one of the two refuges – Les Mouflons or Refuge du Toubkal (CAF). In the summer months, camping is possible near the refuges.
Both refuges offer a similar experience, though the CAF refuge is a bit more basic. Neither is luxurious - expect shared dorms (unless you book a private room), communal toilets, simple food and no heating. The lack of heating is particularly noticeable in winter, but even in summer temperatures drop significantly overnight, so a warm sleeping bag is essential. Blankets are available if needed. Earplugs and a sleep mask are lifesavers if you want a chance at a half-decent night’s sleep.
If going with a guided tour, your refuge will be arranged in advance for you. If organising things independently, you can book online via contact forms on both websites. We initially planned to organise everything ourselves and found both refuges very responsive. Payment will be made in cash on arrival (see costs section below).
If planning everything yourself, it's well worth spending a night in Imlil before the trek to acclimatise and explore the valley. There are lots of reasonably priced options on Airbnb – we paid £30 for one night for the two of us. Many places will also offer home-cooked food for an extra fee. I would highly recommend this; the food was very tasty, with generous portions. We were made to feel at home and were sad that we only stayed a day in Imlil.
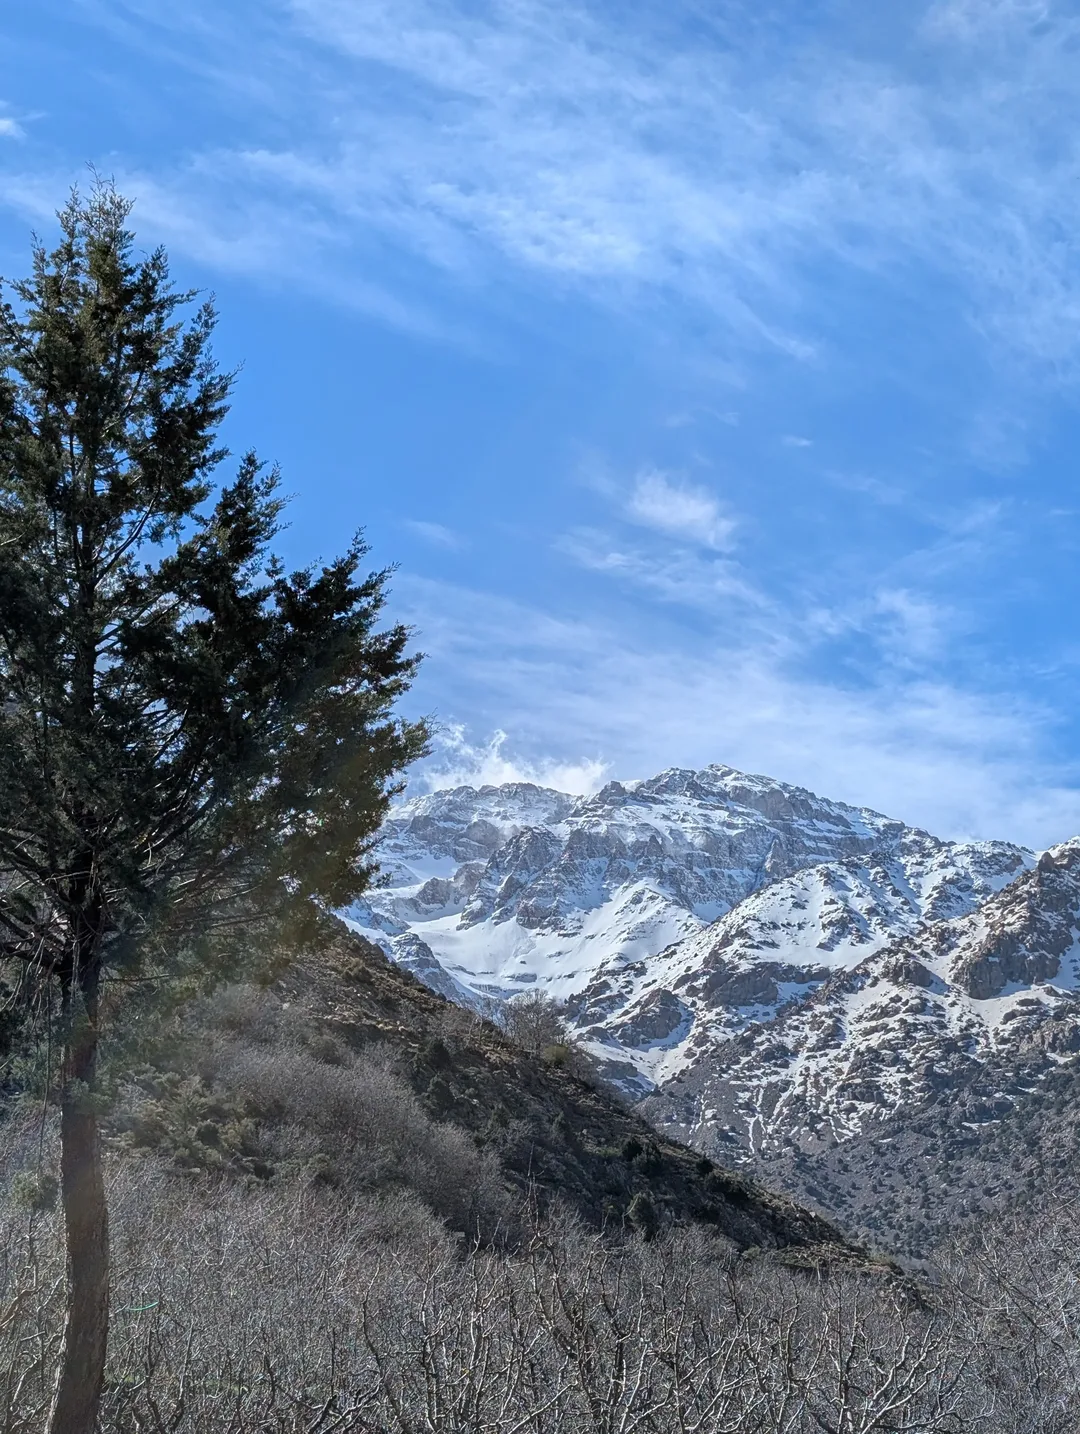

The snowy Atlas Mountains from the path near Imlil.
Gear for Mount Toubkal (Winter vs Summer)
I won’t go into the line-by-line detail of a packing list; there are plenty of these online, and guides/tour companies will advise what you need. (Adventure Base has a good packing list.) High-level though, summer ascents require basic hiking gear and a sleeping bag. I would advise you to bring your own sleeping bag or at least a liner – not sure how often the bags guides provide get washed!
In winter, you need basic hiking gear (with more layers and sturdier boots - ideally B1s or B2s) and a sleeping bag again. Make sure this is warm enough – we had -5°C bags, and these were plenty warm in March. You will also need crampons and an ice axe – you can rent these in Imlil, but beware that they are likely to be blunt and there have been instances where people have had rented crampons break on them.
Less obvious items that are worth mentioning are:
- Cat 3 (ideally cat 4) sunglasses – snow blindness is real and they make a night-and-day difference in terms of comfort and being able to perceive depth in the snow.
- Camelbaks are useful for the trek in and out, but are likely to freeze on the final ascent (especially in winter). If you’re bringing a hydration bladder, make sure you also bring a classic water bottle – wide-neck (e.g. Nalgene) bottles are good because they are less likely to freeze.
- First aid kit – you might be tempted to leave this at home, given you’ll be guided. In our experience, the guides had limited first aid (if any). Someone slipped and cut their hand on an ice axe, and the guides didn’t have plasters.
Toubkal West and the Atlas Mountains from the summit.
Altitude and Acclimatisation
The main draw to climbing Toubkal is that it is the highest mountain in North Africa. As a result, altitude is a factor you need to plan for. Staying at the refuge helps with acclimatisation, but the ascent is still fast, unless you are arriving in Morocco acclimatised.
Many tours come straight from Marrakech to Imlil, advertising that you can climb Toubkal in a weekend. Whilst this is doable, and most people will be fine, you will have a much more enjoyable experience if you can spare an extra day. On our two-day trek, a couple of people did get altitude sickness and had to turn around. A day in Imlil before starting helps; even better would be a three-day trek – some companies offer even longer.
A few tips to make sure you are as well-prepared as possible, regardless of trip length:
- Come to Morocco with a decent level of cardiovascular fitness. Being conditioned to perform steady-state cardio for extended periods gives you the best chance of handling altitude well. Think long, slow runs and long walks for training. Fitness alone doesn’t guarantee you’ll handle altitude well, and you should still take steps to acclimatise.
- Get sufficient sleep in the days leading up to your climb.
- Eat plenty of carbs the day before your climb.
- Drink plenty of fluids.
- Make sure you apply ample sunscreen (UV is stronger up high), especially on the underside of your chin and nose. The light bouncing off the snow tends to burn you in unusual places.

View from the summit, over to the Sahara Desert.
Cash, Costs and Payments in Imlil
The Moroccan Dirham is a closed currency, which means you can’t exchange into Dirhams before you fly. There are no ATMs in Imlil, and very few places (if anywhere) take card payments. The easiest option is to withdraw cash at the airport, but you’ll pay a premium. There are ATMs in Marrakech.
In Imlil and at the refuges, they do tend to accept Euros and Pounds and it’s not uncommon to get a mix of currencies as change. A rough exchange rate of 1:10 is used for Pounds – i.e. £10 = 100 Dirhams. If only for peace of mind, it is probably still worth getting some Dirhams out.
Once in Imlil, you need cash to pay for:
- Bottled water on the route – there aren’t many taps on the trek, and I wouldn’t risk it anyway - there are plenty of stories of people getting stomach upset
- Snacks – though you can of course bring your own, which we did
- Gear rental – see gear section
- Tips – the guide costs are very low, but it seems to be the norm to tip guides and cooks. The guides work very hard, so I didn’t begrudge tipping. Everyone in our group tipped 100-200 Dirhams each.
Our guide company recommended €80 per person to cover all the above, which is about 900 Dirhams. (See what I mean about mixing currencies?).
If you are organising a guide yourself, you will also need cash to pay for lunches, the refuge and the guide themselves.
We initially planned to organise everything ourselves and were quoted 600 Dirhams per person per night (including dinner and breakfast) in a dorm, or 1500 Dirhams for a twin room in Les Mouflons. The CAF refuge was similar, if a little cheaper. You can book the refuges online, but you pay in person (see accommodation section).
Prices for guides will vary and can probably be haggled in any case. We were quoted €140 for a guide for the two of us (1500 Dirhams). We ended up using “Get Your Guide” for simplicity and because it worked out quite a bit cheaper.

Icy slopes en route to the refuge.
Related Posts
Allalinhorn (4,027m) - Route Guide & GPX | An "Easy" First 4,000m Peak
Last updated: July 2026 The Allalinhorn isn’t exactly a famous name outside of climbing circles – I hadn’t heard of it before booking a trip to Saas Fee. It doesn’t have the looks of the Matterhorn...

Comapedrosa (2,943m) - Route Guide & GPX | Andorra's Highest Mountain
Last updated: July 2026 Whilst the Alps get most of the attention in the European mountain scene, there’s an equally beautiful and dramatic range on the other side of France. The Pyrenees form the natural...
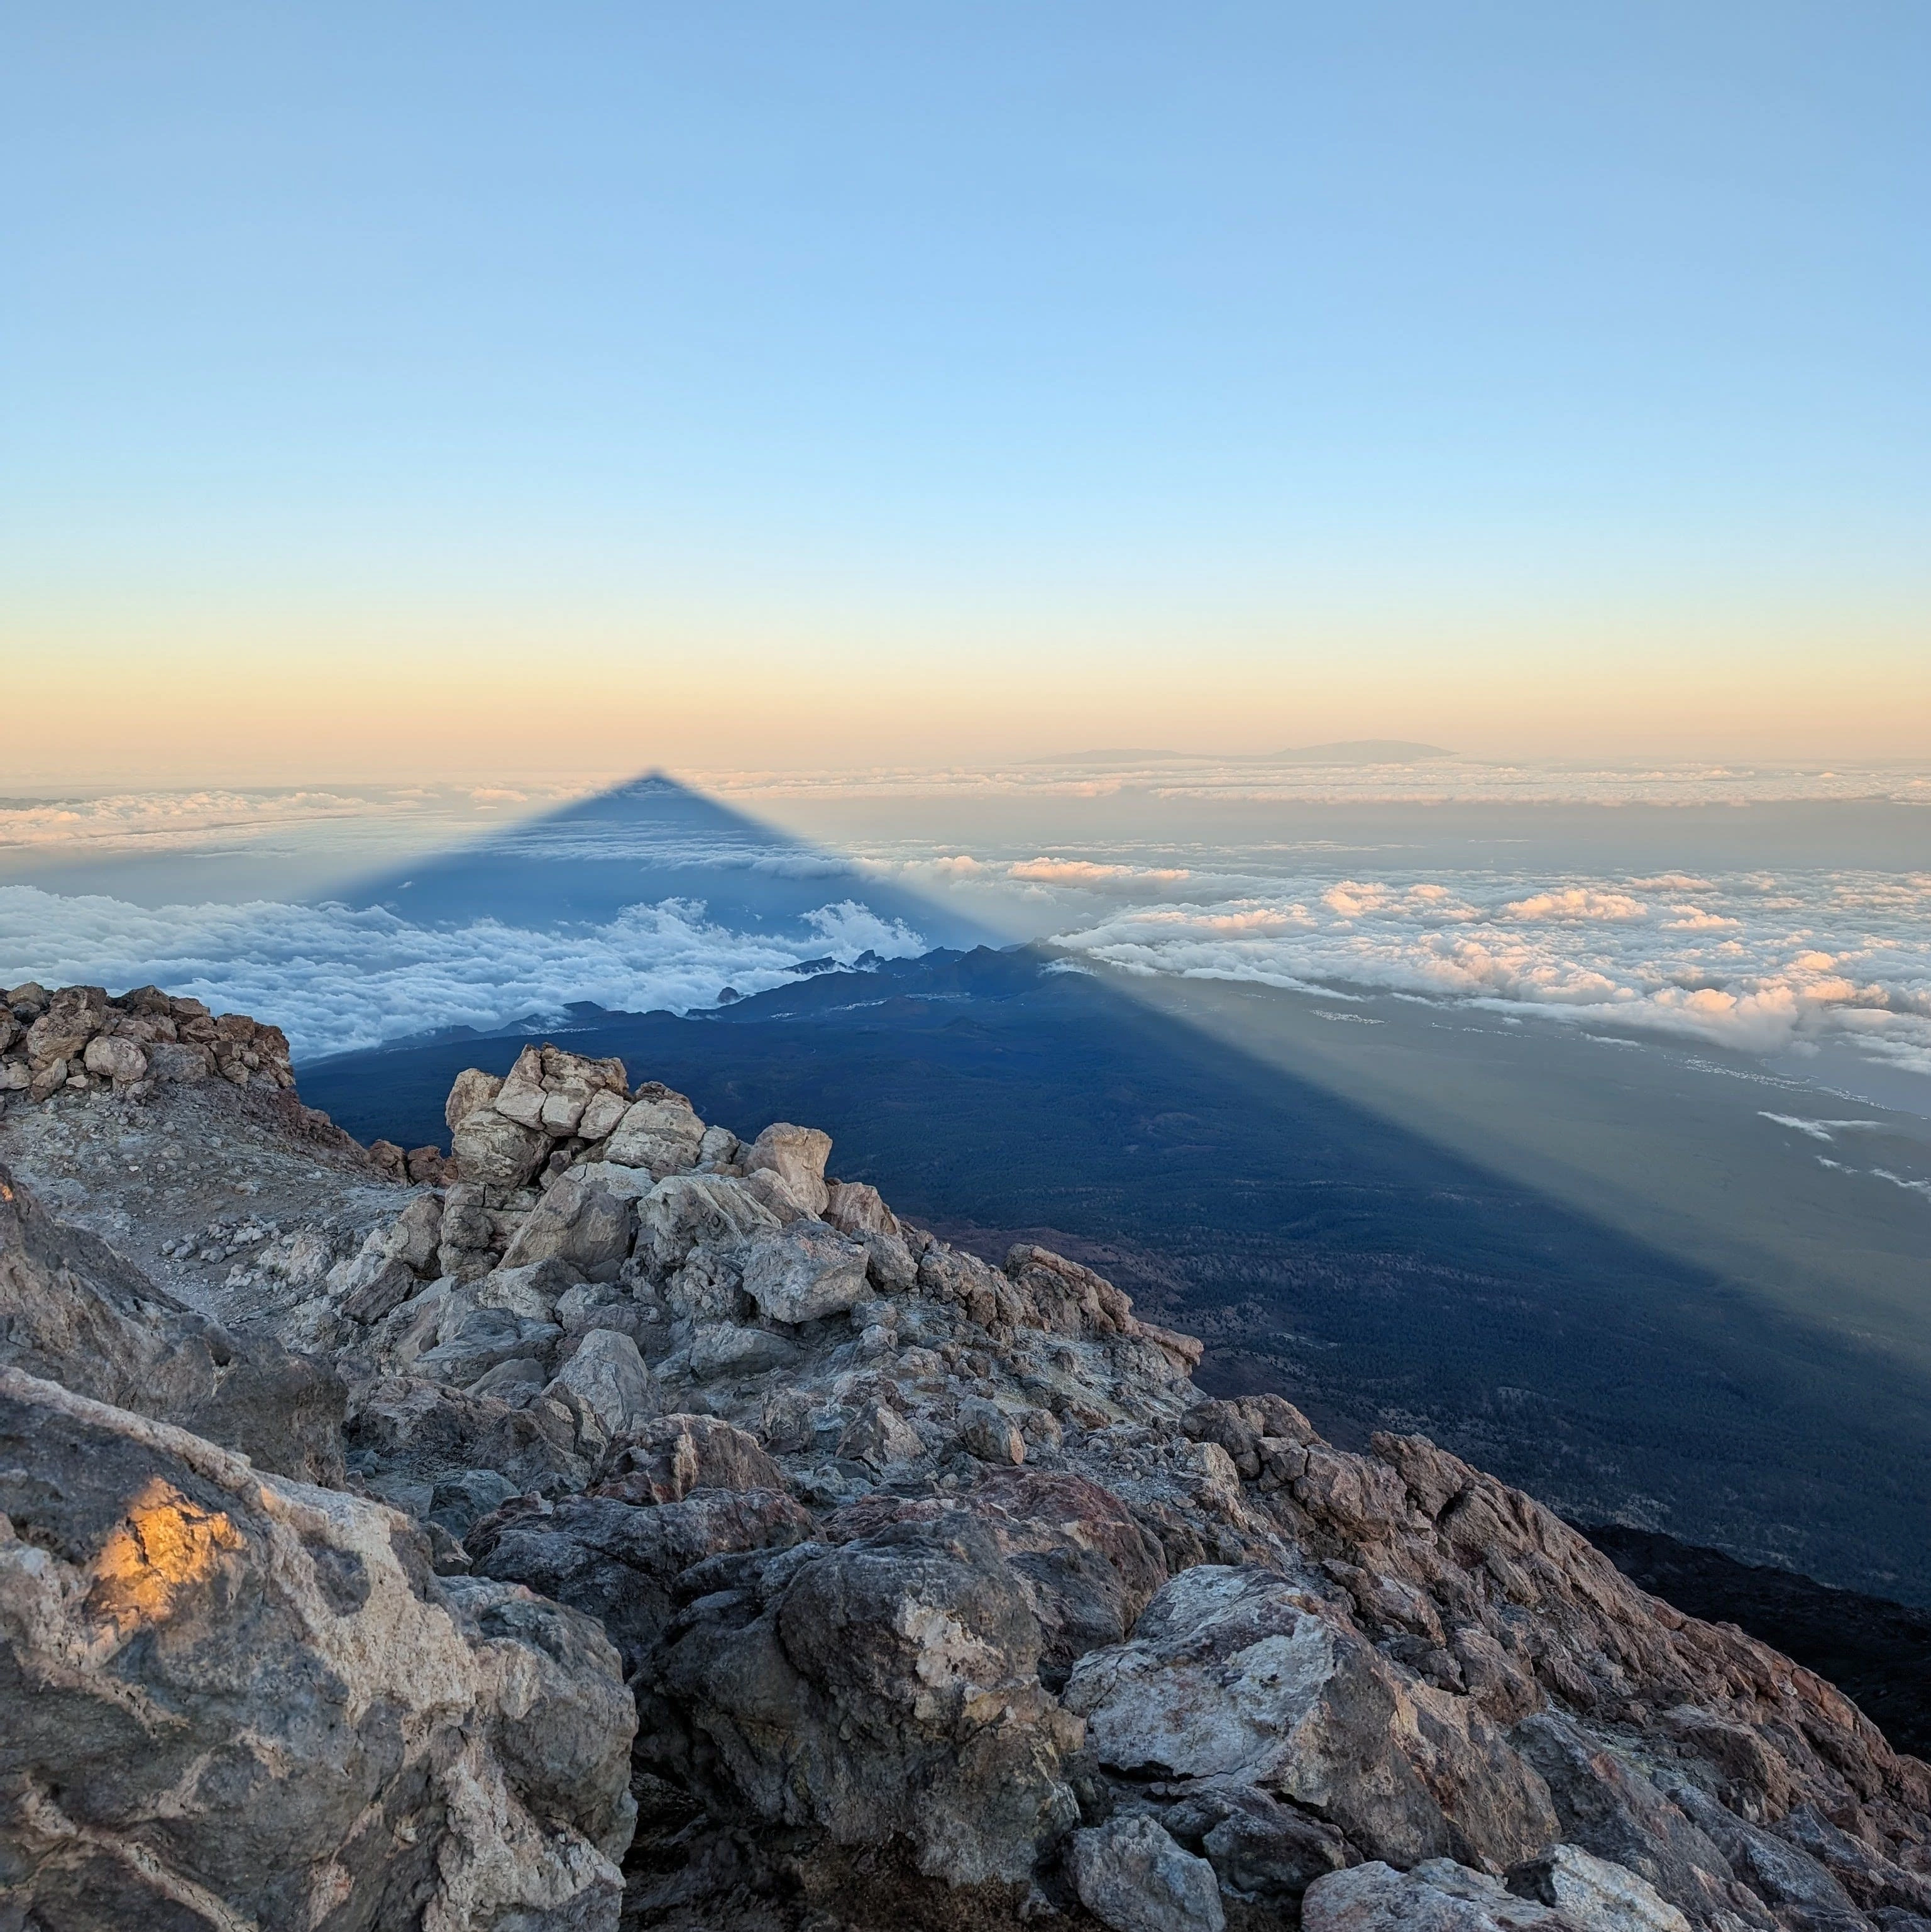
Mount Teide (3,718m) - Route Guide & GPX | Sunrise from Spain's Highest Mountain
Last updated: July 2026 Pico del Teide, or Teide for short, rises magnificently out of the Atlantic Ocean on the island of Tenerife. At 3,718m, it is probably one of the highest peaks in Europe that...