- Published on
Nadelhorn (4,327m) - Route Guide & GPX | Learning Lessons the Hard Way
- Author
-
-
- Name
- Posts
- Posts
-
Last updated: September 2026
The Saas Valley is home to one of the highest concentrations of 4,000ers in the Alps, with 18 4,000m peaks surrounding the valley. These range from Allalinhorn, one of the most popular first 4,000m peaks, to more technical summits such as Lenzspitze. Nadelhorn sits somewhere in between: a step up from the easier 4,000ers, but without becoming overly technical.
At 4,327m, Nadelhorn is also firmly in the big leagues, with the normal route from the Mischabelhütte requiring an alpine start for a glacier crossing before an airy climb up the Northeast Ridge. On paper, the route is a relatively straightforward PD route – but as we found out, that doesn’t necessarily mean it’s straightforward on the day.

The Saas skyline from Almagellerhorn. Peaks from left to right - Rimpfischhorn, Allalinhorn, Alphubel, Täschhorn, Dom, Lenzspitze, Nadelhorn
I climbed Nadelhorn as the culmination of a week in the Alps, after a crevasse rescue course in Chamonix, via ferratas on Jegihorn and Almagellerhorn, and a second ascent of Allalinhorn for acclimatisation.
Nadelhorn Route Guide - At a Glance
Nadelhorn (4,327m) is one of Switzerland’s 4,000m peaks and the highest summit on the Nadelgrat. Despite its height, it is not readily visible from Saas-Fee, tucked away amongst a crown of giants. The mountain sits between the Lenzspitze and Stecknadelhorn, the former often linked to Nadelhorn with a spectacular traverse. The normal route from the Mischabelhütte follows the Hohbalm Glacier to the Windjoch before climbing the Northeast Ridge to the summit. Officially graded PD, the route combines significant glacier travel with scrambling up to grade 2, making it a step above some of the easier 4,000m peaks in the Alps.
Overall rating: ★★★★★ - A proper alpine day out with a pre-dawn start, glacier travel, some exposed scrambling and a beautiful summit ridge.
Difficulty: ★★★★½- Physically demanding due to the altitude and length of summit day with exposed grade 2 scrambling. The normal route is graded PD but, as we found out, conditions on the day can make it feel a lot more serious.
Start point: Hannig
Distance: 15 km round trip
Elevation: 2,000m total ascent
Time: 2 days
- Day 1 - 4.5 km - Steep ascent to Mischabelhütte from Hannig ~1,000 m elevation gain
- Day 2 – 10.5 km - Alpine start ~ 1,000 m ascent followed by a full descent of 2,000m
Gear needed: Full alpine gear - ice axe, crampons, helmet, rope, crevasse rescue kit
Need to know: The route involves glacier travel, exposed scrambling and sustained time above 4,000m. Conditions can have a huge impact on difficulty; during our ascent, poor glacier conditions turned what should have been a relatively easy snow slope into the crux of the route. Previous alpine and glacier experience is essential.
The Ascent


Day 1 – Mischabelhütte approach
On paper, day 1 was easy, a “rest” day even – just a 5 km approach to the hut. How hard could that be?
There are two options for the approach: either start from Saas-Fee and complete all of the ascent under your own power or cheat a bit - get the cable car up to Hannig and join the main route higher up. The latter reduces the ascent from about 1,500m to 1,000m. The decision was already made for us because the direct path from Saas-Fee was closed, presumably because of rockfall. (The Swiss Alpine Club has a great map that shows which paths are closed.) Sad that we couldn’t do the extra ascent (not), we used our Saastal cards and got the cable car up the first 500m of the ascent.

The peaks of Saas Fee from Hannig - Allalinhorn front and centre.
We left Hannig at 9 am, with the route initially climbing gradually and crossing a couple of streams for the first 2 km. Progress was slowed slightly by getting stuck amongst a herd of goats, so unbothered by our presence that they would happily stop right in front of you. They were also equally happy to nudge you if you were going too slow. One of them even decided to use me as a scratching post, honoured, honestly.
Before long though, the path veered off up towards the hut, with blue and white markings indicating the start of the alpine trail. Accordingly, the path quickly steepened – the 1,000m of ascent had to come in somewhere.

GOAT.
I had read online that there was a via ferrata-style section on the approach, but I naively assumed this just meant a ladder or two and the odd steel rung.
No, this was basically a proper via ferrata but without the via ferrata kit.
The approach is never massively exposed, but is extremely steep and on rough terrain, following the spur of the mountain straight up to the hut. Thankfully, the earlier days of via ferrata had desensitised me a bit, and this wasn’t too daunting a prospect. Regardless, not one for those without a good head for heights.
Sweaty from the hot sun, we reached the hut within just over 3 hours. By the time we arrived, I was wearing my climbing harness, having run out of rucksack space with all my layers packed away. This was about the expected time and good going, considering the goat traffic jam.

The steep approach just before the "via ferrata" section
Precariously perched on the spur of the mountain at 3,340m, the hut provides outstanding views over Saas-Fee towards Allalinhorn and across the valley to the Weissmies group. Its isolated position means that all supplies come via helicopter. The hut is very well looked after and clean. We were one of the first to arrive, and it was very quiet – so much so that we couldn’t work out where to go.
We rested up for about an hour and ate our sad, squashed sandwiches before emptying our rucksacks of all but the essentials to head up the route a bit to do some scouting before tomorrow’s early start. By now the temperature had dropped a bit, which was much appreciated.
The path past the hut goes straight into a scramble along the same spur, which was easy enough but would throw us straight into it in the morning. Navigation was the bigger challenge, with several cairns dotted about the place which contradicted one another. It was unclear where we would leave the ridge – there was a clear path worn into the glacier below, which led straight to a maze of crevasses. Definitely not the one.
The Swiss Alpine Club recommends following the 3,620m contour in a semi-circle across the glacier. Based on this, we worked out we needed to be higher up the ridge.
Sure enough, a few minutes higher up, a well-built cairn marks a break in the ridge where you can drop down to the glacier. The track on the glacier wasn’t as clear here, but the previous weeks of hot, dry weather had left little snow on the glacier, so there wouldn’t have been a track in any case. As I’m writing this, I’ve seen that the Swiss Alpine Club has updated its information to suggest following the ridge higher than “previously usual”, which is consistent with the dead-end track we saw.

The cairn just before you drop down to the glacier, clouds clinging to Lenzspitze above, Nadelhorn to the right.
The glacier continued the trend we had seen elsewhere, very dry with lots of visible crevasses. Thankfully, from where we were standing, the glacier crossing itself didn’t look too sketchy. We had already scrapped our plan to traverse Weissmies the day before after one look at the glacier, which was practically impassable.
As we were making our way up the ridge, I kept checking out the slope on the other side of the “bowl” of the main glacier. This would need to be climbed in the morning to access Nadelhorn’s NE ridge. This was the most intimidating part of the climb and, depending on the aspect, looked really easy or really steep, no in-between. It also looked very icy, which in hindsight we should have thought more about (more on that later).
The break in the ridge marked the end of our route scouting for the day – crampons stayed in the hut. We retraced our steps back down, this time paying attention to the route and trying to memorise where to go for the morning. We were back down in about 40 mins with just enough time to drink a litre of tea before dinner.
Dinner in the hut consisted of soup, sausage and fries (I think that’s what they were?) and chocolate cake. A good meal considering we were well over 3,000m. One issue with being over 3,000m up, though, was that there was no drinkable tap water (obviously). What I failed to realise ahead of time, though, was that a 1.5l bottle of water would cost 16 Francs. The rest of the food was fairly reasonably priced* so it looks like they recoup the cost of helicopter supplies with the water alone. If you’re feeling fit and you’ve got enough bag space, it’s worth bringing as much water as you can up.
With bellies full and wallets drained, it was time for an early bedtime of about 9 pm.
* Considering being over halfway up a mountain in Switzerland, which isn’t saying much. Hot water for tea was cheaper than bottled water; do with this information what you will.
Day 2 - Summit Day
I woke up half an hour before my 3 am alarm, having got a solid four and a half hours' sleep. My sleeping bag liner was practically in tatters around me – I spent the night cursing as it ripped at every slight movement. My self-pity was short-lived, though, when I got downstairs to see my climbing partner downing coffee to try and offset his 2 hours of sleep. Suddenly, I felt quite smug about my relatively good night’s sleep. I spent a night at the Torino hut the weekend before as part of a mountaineering course, which definitely helped out with the acclimatisation.
We forced down a breakfast of (very) tangy yoghurt and the classic slightly stale bread roll before heading down to the kit room to don our kit. Head torches on, we left just after 4 am, slightly behind schedule.
Straight onto the ridge, at an admittedly unsustainable pace, we made quick work of the early-morning scramble; our scouting the day before paid dividends as we were able to pick our way up the boulders to the break in the ridge. We were up the ridge in about 45 minutes, ahead of our predicted 1 hour. That left plenty of time to rope up and find the route across the glacier. As we did so, I watched the line of headtorches make their way up Lenzspitze - the more technical route, beyond our pay grade at this stage.

Headtorches heading up towards Lenzspitze
The glacier was surprisingly quiet; I was expecting to be following groups the whole way up. Lenzspitze seemed the more popular route. Thankfully, though, we managed to quite quickly find the path across the glacier – my Garmin had us at pretty much bang on the 3,620m contour the whole way across. The main glacier crossing was uneventful, with minimal small crevasses to cross, which let me relax a little and appreciate the early morning alpenglow that was now developing spectacularly. We were across the bowl in about 10-15 minutes.
Now though, we were faced with the icy slope I had been eyeing up the day before. The path first continued up the base of the slope diagonally but then seemingly disappeared. The slope was bare ice, and so any fall felt like it would have been very consequential, especially with a crevasse perfectly positioned across the base of the slope. We were not the only team struggling; a team who were close to us on the glacier were slowing below us – we would later meet them ascending as we were halfway on our descent of the ridge.

The early-morning alpenglow from the glacier
Before long, we were forced to front-point our way up the slope, which was my first time doing this in anger. At first this went well, and we made excellent progress, but I will admit that as we reached the top I very much got in my own head, paranoid that my crampons were loosening. The thought of falling down the slope into the crevasse below kept repeating in my head, which wasn’t helped by my Garmin’s emergency alert trying to contact Ros with every other strike of the ice axe. (That feature soon got turned off.)
My climbing partner took the lead, and before long we reached the top of the slope (Windjoch) and onto the snowy ridge. After all that, the sun was up, but we had only been going about 2 hours and so had stayed on time. We stopped for a breather before the final slog up the ridge. The thought of having to descend the icy slope lingered in my head as we set off.
The ridge itself was stunning, starting entirely on snow and then increasingly alternating between rock and snow as it neared the summit. This is still a glacier, though; there were some crevasses to cross on the lower half. Some guides suggest that some of the rocky sections can be bypassed on the snow. Staying on the rocks involved some sections of grade 2 scrambling in crampons, but with the exposure on the snowy north-west side, it felt like the safer option. We stayed roped up on the descent, carefully picking our way up through the rocky sections with plenty of breaks.

Nadelhorn's northeast ridge, seen here on descent.
Despite spending nearly a week at altitude, I could really feel the elevation the whole way up the ridge, with practically the entirety sitting at over 4,000m. Pace really slowed on the ridge, the snow sections turning into a mental game of putting one foot in front of the other. Whilst more technical, the rocky sections were a good point to rest, as these tended to lie on the south side of the ridge and gave some welcome respite from the icy wind.
My climbing partner rock-climbs regularly, so whilst we’re both relatively new to the alpine, I was glad to have him there as he was setting up anchors without thinking as we rested on some of these rocky sections.

The morning's glacier crossing looking very far below us
The final rocky ascent to the summit was the most technical, but still in the realm of grade 2. Views by this point were outstanding, with the Matterhorn in clear, unobstructed view ahead and the Bernese Alps behind, including the Aletsch Glacier (the largest in the Alps). I wish I had taken more photos, but at this point I was so focused on climbing that I couldn’t manage much more than a quick snap.
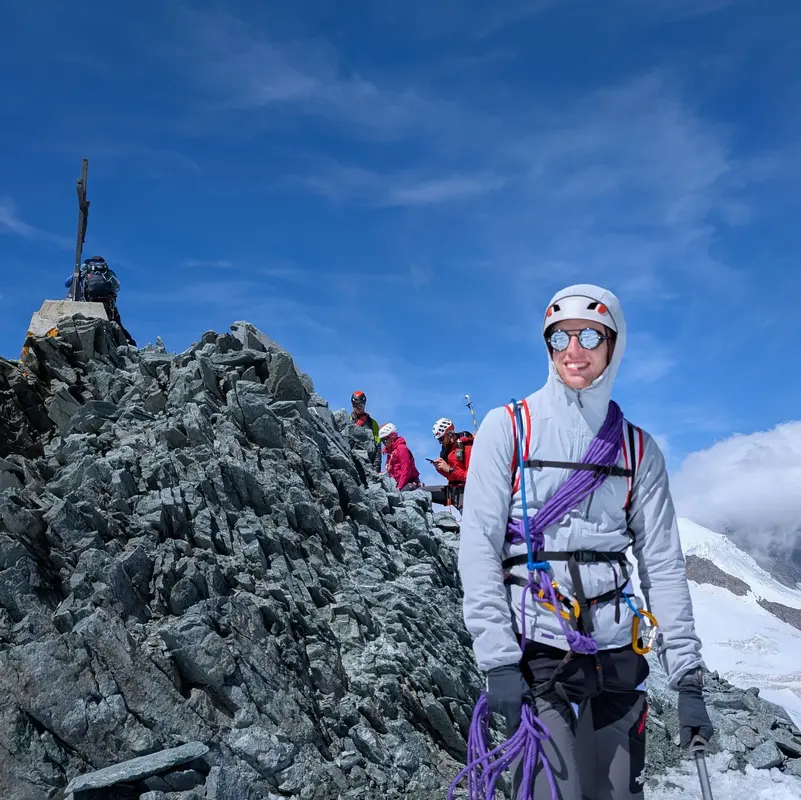
We hit the summit after about 4.5 hours, took a quick photo and touched the steel cross before making our descent. We were very conscious of the time. The last cable car from Hannig left at 4:30 pm, and we didn’t fancy the additional 500m of descent into Saas-Fee.

Summit view, with Dom's glaciated slopes on the left, and the Matterhorn in full view. Mont Blanc is the glaciated peak on the horizon, right of centre.
My climbing partner suggested unroping for the initial rocky descent down from the summit. Whilst I wasn’t keen on the idea, admittedly being the weaker climber, I understood the reasoning – a fall here would have pulled both of us off the mountain. Other groups were doing the same. We unroped; if I was focused before, I was extremely focused now.
The descent from the summit was thankfully uneventful, and we roped back up again on the snow and made our way down to Windjoch. The descent of the icy slope from this morning awaited us. Before you get to the slope itself, there is a steep snow section, with the path carved deep into the snow blown up the ridge so that there’s a wall either side of you. This was extremely slushy by now, and both of us slipped on the way down; thankfully, a slip was inconsequential here with enough runoff.
The same could not be said for what lay ahead of us.

View back down the northeast ridge
The initial descent of the icy slope was fine, and my negative spiral from the morning was thankfully behind me. However, as we descended, it became clear that the slope was practically melting in the late morning sun, with streams of water flowing down the face.
We made it about halfway down by keeping crampons sideways on the slope, but with the slope being bare ice, there was little room for error.
My climbing partner slipped, losing his footing and sliding straight towards the crevasse at the base of the slope.
In what felt like minutes, but was realistically milliseconds, I watched him try in vain to self-arrest, his ice axe skipping over the surface of the hard ice. I fell to the floor and self-arrested, bracing for the rope to pull me down.
Both of us arresting did the trick, though, and he stopped.
Carefully, we regained our feet, checked we were both okay and continued down. However, not a minute later he slipped again, and again the ice axe failed to bite.
This time I managed to hold him without arresting myself, my footing thankfully strong enough that pulling on the rope stopped the fall.
A choice selection of four-letter words followed from both of us.
At this point, as if on cue, rocks started falling from the cliff above, sliding down the icy face.
What started as a few little stones soon turned into lumps the size of footballs. If one of these so much as grazed us, it would have knocked us off our feet and towards the crevasses below. A direct impact would have done some serious damage.
We needed to get off this slope, and fast.
I shouted down that we needed to front-point down – the slope was too icy to walk down in tandem. We took turns at taking a strong stance with ice axe planted whilst the other downclimbed the face.
Holding the ice axe by the bend in the shaft and stabilising myself with the other hand, I inched my way down the face. Every other strike of the ice axe shattered the melting ice.
This was not what we had in mind when we set out.
I completely shredded my liner gloves on the moraine-covered ice, but we were down in a couple of rope lengths.
Back on the glacier, we were out of the worst of the rockfall, but both moved with a pace that can only be described as booking it. We both wanted to get back onto the safety of the ridge as soon as possible. In 10 minutes, we were off the glacier, and we couldn’t get our crampons off soon enough.
It’s weird how the mind works – on the morning ascent I was so in my head, but there was far less objective danger. I genuinely feel like I was calmer on the descent despite nearly getting pulled off the mountain twice and then being in the firing line of rockfall. Looking back, we worked well as a team – my climbing partner was there to take charge when I (for want of a better word) lost my head on the ascent, and I was there on the descent.
We stopped off at the hut en route, ate another set of sad (even more squashed) sandwiches and worked our way back down the steep via ferrata-esque approach.
The cable section seemed to last forever.
A couple of days before on Almagellerhorn, I had complained about having to descend via ferrata and joked that I “couldn’t wait to do it again”, not knowing that Nadelhorn would be an even longer via ferrata, just unprotected.
Serves me right for my sarcasm.
Nearly 11 hours after setting off that morning, we made it to the cable car, knackered but with plenty of time to spare. I looked back up at Nadelhorn from the cable car, its peak barely poking into view.
It didn’t quite feel real that we’d been up there just a few hours earlier.

Looking back up towards Nadelhorn, Lenzspitze is the prominent peak in the centre, Nadelhorn hiding off to the right.
Lessons
Whilst I write these posts as if they’re for an outsider, they’re really a personal log in disguise. At a glance, the trip can seem like a success - we summited, stuck to our planned times (in line with SAC timings) and made it back safely. But looking back, some critical mistakes were made.
I think it’s important to acknowledge these so that I can improve in the future, and maybe these lessons will resonate with someone else.
- Scrambling – I felt confident enough on the rocky sections, but to progress onto much harder routes I need to get a lot more comfortable with scrambling beyond grade 2 and placing protection. I relied on my climbing partner more than I would have liked in this regard.
- Gear - My relatively soft Mammut Kento B2s should be fine for the non-technical mountaineering that this climb should have been. However, due to glacier conditions, we had to front-point a lot more than expected, and more than you would expect for a PD climb generally. Whilst my crampons stayed attached this time, they did not inspire confidence on the ascent and did need tightening a few times. For similar future climbs, I will look to bring a stiffer pair of B2s to cover the worst-case scenario.
- Reading the conditions – We knew that glacier conditions across the Alps were dry, and we saw it first-hand with the absolute state of the Weissmies glacier. We also saw that the slope up to Windjoch looked icy. We should have realised that there’s a reason a south-facing slope is bare ice – because it melts and refreezes regularly. We predominantly based our timings for the day based on making it down for the cable car. While we were one of the first, if not the first, to leave for the Normal route, after seeing the icy slope the day before, we should have left earlier to get down before the sun started to melt the slope. The glacier crossing itself was easy for us and could realistically have been done in the dark by the light of a headtorch.
As above, these are personal lessons and may or may not apply to someone else. Maybe you’d be quicker on the ridge, so you wouldn’t need to leave any earlier, or maybe your team would be less confident crossing a glacier in the dark.

The crevassed bowl of the glacier, with the icy slope to Windjoch
Planning a Trip? - Some Practicalities
GPX Route
This GPX route was recorded by us during our ascent (as is reflected on the 3D route map) and includes the hut approach from Hannig. Glacier and mountain conditions can change, so treat this as a rough guide rather than a precise plan. I would specifically treat our ascent up the slope to Windjoch with caution; there may be a better route on the day you climb. Always prepare carefully and follow local safety guidance.
Accommodation
The normal route practically requires an overnight stay at the Mischabelhütte so you can cross the glacier before conditions deteriorate too much later in the day. The hut can easily be booked online, and payment is made in-person. They do accept card, though you pay a small fee for the convenience.
There is no drinking water supply, owing to the hut’s location, and you’ll pay a pretty penny for bottled water - 16 Francs when we went. It would be worth bringing an extra bottle up to the hut, but don’t underestimate the approach – it is very steep.
The hut is very clean; the toilet situation is surprisingly good, and the dinner (an option when you book) is tasty, and there’s plenty of it. This is not a hut where you feel like you’re roughing it.
As with most huts, though, a sleeping bag liner is needed, and earplugs and a mask are basically essential for a good night’s sleep.

View from the rocky ridge by the hut
Getting There
Map of start point above - click "Open in Maps " to open Google/Apple Maps and get directions
Saas-Fee is a car-free town, so use the (very good) local bus network to ride to the Saas-Fee bus terminal. You can drive and park at a multi-storey car park at the entrance to the town, but it would probably be more hassle than it's worth.
From there, you can walk to the Hannig cable car, per the map above. Check the lift timetables and the operational status of the lifts before you head out.
One benefit of Saas-Fee is that in the summer and autumn, if you are staying in the valley, most accommodations offer the Saastal Card. This provides free unlimited use of the lifts and buses during your stay (excluding the MetroAlpin, for which you can buy a discounted ticket). This means you save a huge amount of money compared to staying in other areas, where you could easily spend north of 100 euros a day on lifts. If you stay at one of the campsites (which also offer the card), a week in Saas-Fee is probably one of the cheapest ways to get out in the Alps. (Not sponsored by the Saas-Fee tourist board, but I'll happily take a sponsorship if anyone's reading this!)
When to Climb
The main climbing season for Nadelhorn is generally July to August. In late summer, the route can become increasingly icy, particularly on the approach to Windjoch, which can make September less favourable. Outside of this period, it is a much more involved ascent. Obviously, weather conditions on any given day/year will influence how viable a climb is – for example, 2026 was an exceptionally hot summer, so conditions were very icy even in late July when we climbed.
Weather
The weather in the Alps is famously changeable, with afternoon thunderstorms common. This means that morning ascents are best (plus, snow conditions are better - see below). Saas-Fee has a great network of webcams around the resort, which are sometimes more useful than a weather forecast for checking conditions on the day. See embed below – please note that this is Hannig, so you can’t really see Nadelhorn itself, but it gives you an idea.
Glacier Travel
On summit day, besides the initial rocky ridge, practically the entire route is on a glacier. Even on the rocks, you will be climbing with crampons on. The glacier is crevassed, and you will be crossing snow bridges, some of which you may not always be aware of. Glaciers are an inherently unstable landscape and carry objective hazards that you need to appreciate before setting out on an ascent. As we saw, there is a rockfall risk up to Windjoch, and depending on how far up the glacier the initial traverse across the “bowl” is, that would be susceptible to rockfall from the huge east face of Nadelhorn.
I won't go into the details of glacier travel; I am not qualified to do so for a start. However, you should not attempt this route if you do not have a solid understanding of how to travel on a glacier safely. This includes being comfortable using crampons and ice axes and travelling as a roped party. The glacier means that an early start is essential.
If you are at all unsure of your abilities, you should attend a course or hire one of the many guides available from the valley.

View from the northeast ridge, towards the Bernese Alps, including the Aletsch glacier
Altitude
Nadelhorn is one of the 82 4,000m peaks in the Alps, and practically the entire north-west ridge lies over 4,000m. If you are not at all acclimatised before attempting the climb, you are likely to struggle, and it will not be enjoyable (to say the least). I spent a week at altitude, climbing to over 3,000m every day, including 2 nights sleeping over 3,000m, and I still felt the altitude as we worked our way up the ridge. Given the route is more technical and physically demanding than the likes of Allalinhorn, acclimatisation is even more important here.
A few tips to make sure you are as well-prepared as possible:
- Come to the valley with a decent level of cardiovascular fitness. Being conditioned to perform steady-state cardio for extended periods gives you the best chance of handling altitude well. Think long, slow runs and long walks for training. Being fit alone does not guarantee you will handle the altitude well, and you should still take steps to acclimatise.
- Get sufficient sleep in the days leading up to your climb (easier said than done in mountain huts)
- Do some more walks at reasonable altitudes before your climb to give your body the best chance to acclimatise.
- Make sure you apply ample sunscreen (UV is stronger up high), especially on the underside of your chin and nose. The light bouncing off the glacier tends to burn you in unusual places!

High altitude pros - a herd of ibex seen on the approach
Related Posts

Toubkal (4,167m) - Route Guide & GPX | Climbing Morocco's Highest Peak in Winter
Last updated: September 2026 The Atlas Mountains stretch across North Africa, forming a natural barrier between the Sahara Desert and the Mediterranean. The range tops out in the High Atlas at Mount...

Allalinhorn (4,027m) - Route Guide & GPX | An "Easy" First 4,000m Peak
Last updated: September 2026 Allalinhorn isn’t exactly a famous name outside of climbing circles – I hadn’t heard of it before booking a trip to Saas-Fee. It doesn’t have the looks of the Matterhorn...

Mount Etna (~3,350m) - Route Guide & GPX | Climbing Europe's Most Active Volcano in Winter
Last updated: July 2026 Rising from the Mediterranean, Mount Etna stands as the highest volcano in Europe, the highest mountain in southern Italy and one of the world’s most active volcanoes. What...